janazah prayer dua pdf

The Janazah prayer is a collective obligation‚ seeking forgiveness for the deceased. It involves four takbirs and specific supplications‚ emphasizing community support and divine mercy‚ fulfilling a vital religious duty.

Overview of Janazah Prayer in Islam

The Janazah prayer is a collective obligation in Islam‚ performed to seek forgiveness and mercy for the deceased. It involves four takbirs‚ specific supplications‚ and is conducted standing facing the Qiblah. This prayer emphasizes community solidarity and spiritual support for the departed soul. It is a vital part of Islamic funeral rites‚ reflecting the Ummah’s shared responsibility to honor and pray for their deceased brothers and sisters.

Importance of Dua in the Funeral Prayer

Dua in the Janazah prayer holds profound significance as it seeks divine forgiveness and mercy for the deceased. Specific supplications are recommended after the third and fourth takbirs‚ emphasizing the community’s collective plea for the departed soul. These du’as‚ rooted in the Sunnah and Quran‚ highlight the importance of invoking Allah’s compassion and blessings. They also serve as a means of comforting the family and fulfilling a vital religious obligation.

Structure of the Janazah Prayer

The Janazah prayer consists of four takbirs‚ with specific supplications after the third and fourth. It is performed standing‚ without ruku or sujud‚ emphasizing a simple yet profound ritual.

Key Components of the Funeral Prayer

The Janazah prayer includes four takbirs‚ with specific supplications after the third and fourth. It involves Thana‚ Durood‚ and Quranic recitations‚ followed by duas for the deceased. Purity‚ wudu‚ and proper attire are essential. The prayer concludes with a single tasleem‚ emphasizing communal unity and mercy for the departed. These elements reflect the prayer’s simplicity and profundity‚ fulfilling a vital religious obligation.

Step-by-Step Guide to Performing Salatul Janazah

Begin by facing Qibla‚ forming at least three rows. Intend to perform Janazah prayer. Say Allahu Akbar (first takbir). Recite Thana and Durood after the second takbir. After the third‚ recite a specific dua for the deceased. Conclude with the fourth takbir and tasleem. Ensure purity‚ wudu‚ and proper attire. This structured approach ensures the prayer’s validity and reflects communal unity in seeking mercy for the departed.

Conditions and Requirements for Janazah Prayer

Purity‚ wudu‚ and covering the body’s awrah are essential. The prayer must be performed in congregation‚ fulfilling the communal obligation. Proper attire and respect are required.

Purity and Wudu for the Funeral Prayer

Participants in the Janazah prayer must ensure they are in a state of purity (taharah) and have performed wudu. Cleanliness is a fundamental requirement‚ mirroring the conditions for regular Salah. The deceased’s body must also be washed and shrouded appropriately‚ adhering to Islamic guidelines. These practices reflect the importance of maintaining dignity and respect in fulfilling this communal obligation.

Proper Attire and Etiquette During the Prayer

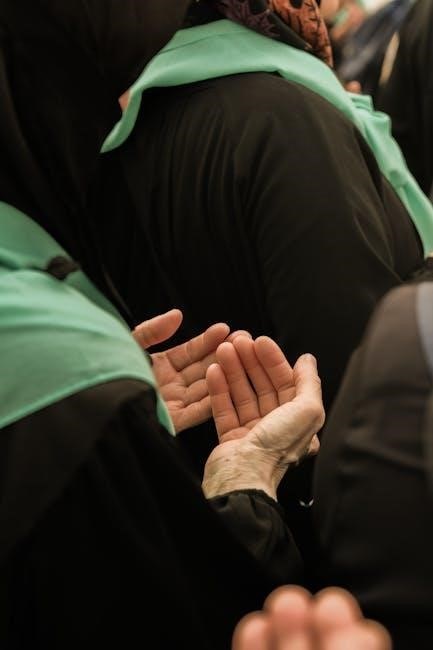
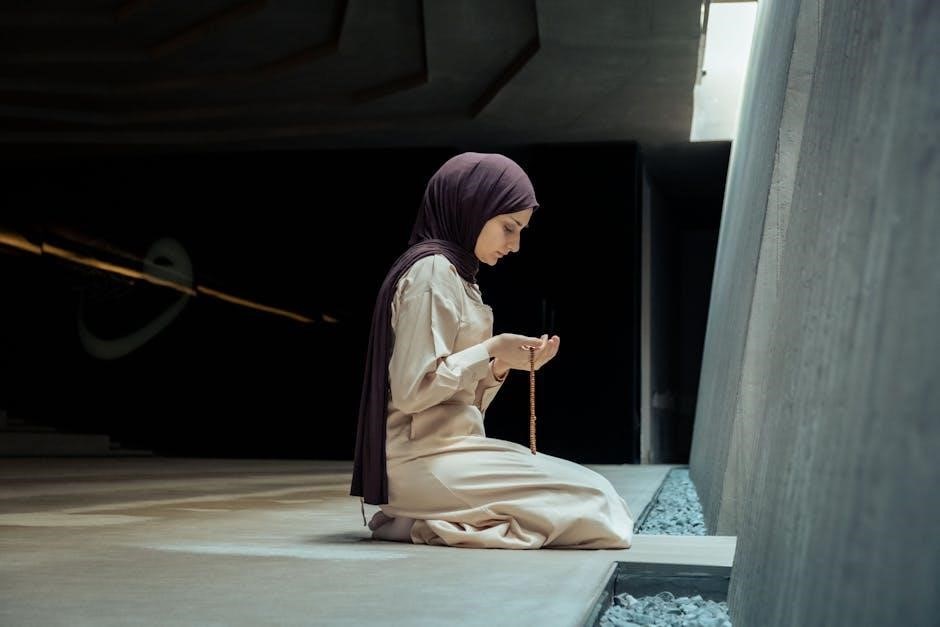
Participants in the Janazah prayer should wear modest and clean attire‚ reflecting respect for the occasion. Men are encouraged to dress appropriately‚ avoiding flashy clothing. Women must maintain hijab. The congregation should form at least three rows‚ standing shoulder-to-shoulder‚ to symbolize unity. Proper etiquette includes avoiding unnecessary talk and distractions‚ ensuring focus on the prayer and supplications for the deceased.

Specific Dua for Janazah Prayer

The Janazah prayer includes specific supplications after the third and fourth takbirs‚ such as Allahummaghfir lihayyina wa mayyitina‚ seeking forgiveness for the living and the deceased‚ emphasizing divine mercy and blessings.

Recommended Dua After the Third and Fourth Takbirs

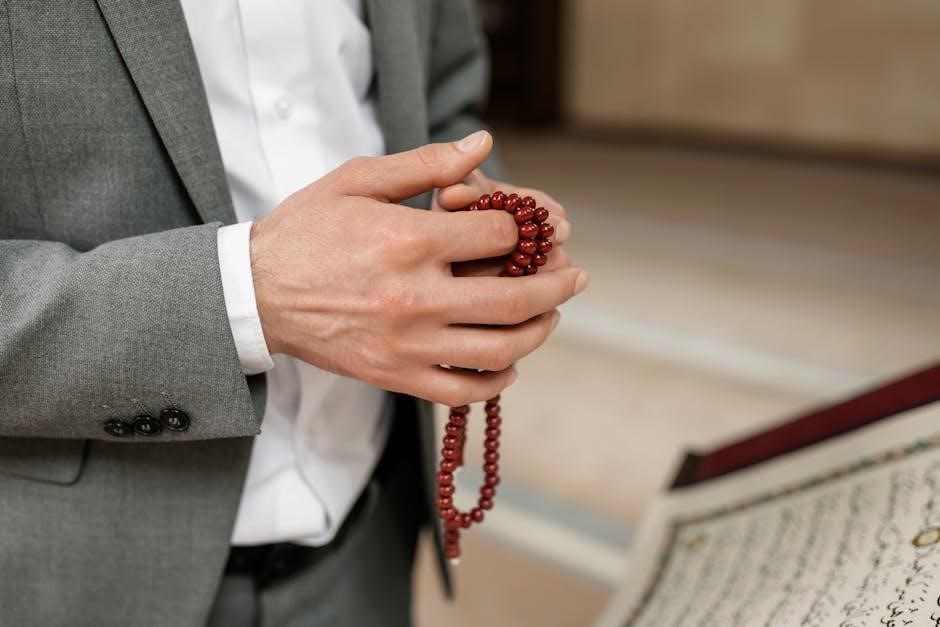
After the third and fourth takbirs‚ specific supplications are recommended; The dua Allahummaghfir lihayyina wa mayyitina is recited‚ seeking forgiveness for both the living and the deceased. Another recommended dua is Allahummarhamhu wa anta khayrur rahimeen‚ asking Allah for mercy on the deceased; These supplications‚ rooted in Islamic tradition‚ emphasize divine mercy and blessings‚ and are often followed by additional prayers for the deceased’s soul.

Significance of Dua for the Deceased in Islam

Dua for the deceased is a significant aspect of Islam‚ emphasizing compassion and divine mercy. It seeks forgiveness and comfort for the soul‚ benefiting the living by fostering community and shared responsibility. Reciting supplications collectively strengthens faith and unity. Rooted in tradition‚ it highlights intercession and spiritual support beyond life‚ comforting the family and demonstrating collective care.

Common Mistakes to Avoid During Janazah Prayer

Common mistakes include forgetting to face Qibla‚ reciting additional verses‚ or failing to maintain focus‚ which can distract from the prayer’s solemnity and purpose.

Understanding Fard Kifayah in the Funeral Prayer

Fard Kifayah refers to a communal obligation‚ meaning the Janazah prayer becomes mandatory for the Muslim community collectively. If some members perform it‚ the duty is fulfilled for all. This principle emphasizes collective responsibility‚ ensuring the deceased receives proper rites while relieving individuals of personal obligation once others have fulfilled it.

Avoiding Makruh Times for Offering the Prayer

The Janazah prayer should be performed during appropriate times‚ avoiding Makruh (disliked) periods such as sunrise‚ noon‚ and sunset. These times are considered significant for other acts of worship‚ and offering the funeral prayer during them is discouraged. It is recommended to perform the prayer before or after these intervals to ensure respect for the deceased and adherence to Islamic guidelines.

Variations and Regional Practices

Regional practices vary‚ with some cultures incorporating local languages or additional supplications; Core rituals remain consistent‚ but cultural expressions enrich the prayer‚ reflecting diverse Islamic traditions globally.

Differences in Funeral Prayer Practices Across Cultures

Cultural variations exist in Janazah prayers‚ such as reciting supplications in local languages or adding regional customs. While the core rituals remain unchanged‚ practices like additional duas or unique supplications reflect cultural diversity. Some communities incorporate traditional chants or specific prayers‚ while others focus solely on Quranic recitations. These variations highlight the rich tapestry of Islamic traditions while maintaining the prayer’s essential purpose of seeking mercy for the deceased.

Language and Recitation in Janazah Prayer

The Janazah prayer primarily involves Arabic recitations‚ including the Thana‚ Durood‚ and specific Quranic verses. While the core elements are in Arabic‚ some communities incorporate additional supplications in their local languages. This practice reflects cultural adaptability while maintaining the prayer’s essence. The use of Arabic ensures universality‚ but regional languages may be used for supplementary duas‚ making the prayer accessible and meaningful across diverse Muslim communities worldwide.

Recommended Recitations and Supplications

Key recitations include the Thana‚ Durood‚ and specific Quranic verses. Supplications focus on seeking mercy for the deceased and are often recited in Arabic‚ following Sunnah traditions.

Thana‚ Durood‚ and Quranic Verses in the Funeral Prayer

In the Janazah prayer‚ the Thana is recited to glorify Allah‚ followed by the Durood‚ which seeks blessings for Prophet Muhammad (pbuh). Specific Quranic verses‚ such as those from Surah Al-Fatihah or Surah Yasin‚ are recommended to invoke mercy and forgiveness for the deceased. These recitations are performed after the first and third takbirs‚ respectively‚ and are essential components of the funeral prayer‚ emphasizing spiritual purification and divine compassion for the departed soul.

Sunnah Prayers and Supplications for the Deceased

The Sunnah prayers and supplications in Janazah prayer are vital for seeking Allah’s mercy for the deceased. After the third takbir‚ the recommended dua is “Allahummaghfir lahu warhamhu” (O Allah‚ forgive and have mercy on him). After the fourth takbir‚ the supplication “Allahumaghfir lihayyina wa mayyitina” (O Allah‚ forgive our living and deceased) is recited. These prayers‚ rooted in the Sunnah‚ emphasize the community’s role in interceding for the departed soul‚ ensuring a meaningful and compassionate farewell.

Role of the Imam in Janazah Prayer

The Imam leads the congregation‚ ensuring the prayer is performed correctly. He guides through the takbirs and supplications‚ fulfilling the Sunnah and communal duty effectively.

Leading the Funeral Prayer and Its Responsibilities

Leading the Janazah prayer is a solemn duty‚ requiring the Imam to guide the congregation through the four takbirs and specific supplications. The Imam must ensure the prayer is performed correctly‚ reciting Thana‚ Durood‚ and the recommended duas after the third and fourth takbirs. They must also end the prayer with tasleem‚ ensuring the congregation follows accurately. The Imam’s role includes maintaining proper etiquette‚ guiding the dua‚ and ensuring the prayer adheres to Islamic guidelines‚ fulfilling the communal obligation effectively.

Guiding the Congregation in Dua and Supplications

Guiding the congregation in dua and supplications during Janazah prayer is a critical responsibility. The Imam leads the recitation of specific duas‚ such as “Allahummaghfir lihayyina wa mayyitina”‚ after the third and fourth takbirs. This ensures the congregation follows correctly and collectively seeks mercy for the deceased. The Imam’s role includes reciting Thana‚ Durood‚ and the recommended supplications‚ ensuring the prayer is performed with proper etiquette and adherence to Islamic guidelines‚ maximizing the spiritual benefit for both the deceased and the community.

The Janazah prayer embodies collective responsibility and divine mercy. Performing it with sincerity ensures spiritual benefit for the deceased and strengthens communal bonds‚ fulfilling a vital Islamic duty.

The Collective Responsibility of the Muslim Community

The Janazah prayer is a shared obligation (Fard Kifayah)‚ emphasizing community unity. Participating in it ensures the duty is fulfilled‚ granting divine mercy. The Prophet (pbuh) highlighted that praying for the deceased earns spiritual rewards. Even if some attend‚ the entire community is absolved. This collective act reflects Islamic solidarity‚ fostering compassion and shared responsibility among believers‚ while seeking forgiveness and peace for the departed soul.

Final Dua for the Deceased and the Muslim Ummah

The final dua in the Janazah prayer seeks divine mercy for the deceased and the Muslim community. Supplications like “Allahummaghfir li hayyina wa mayyitina” (O Allah‚ forgive our living and deceased) emphasize collective forgiveness. The Prophet (pbuh) taught that praying for the deceased earns spiritual rewards. This dua unites believers‚ reinforcing compassion and solidarity. It concludes the prayer‚ imploring Allah’s mercy for the departed and the entire Muslim Ummah‚ fostering a sense of shared responsibility and spiritual connection.

year 1 writing worksheets pdf

Importance of Year 1 Writing Worksheets

Year 1 writing worksheets are essential for developing foundational writing skills, enhancing handwriting, and building confidence in young learners. They introduce basic grammar, spelling, and sentence structure, aligning with curriculum standards. These tools foster creativity through prompts and interactive activities, ensuring a strong foundation for future writing challenges.

1.1 Development of Foundational Writing Skills

Year 1 writing worksheets focus on tracing letters, forming basic words, and writing simple sentences. They introduce grammar rules, punctuation, and sentence structure, helping children understand how to communicate ideas effectively. These exercises lay the groundwork for advanced writing skills, making them indispensable for early literacy development.

1.2 Enhancing Handwriting and Fine Motor Skills

Year 1 writing worksheets include letter formation guides, word tracing, and pen control exercises. These activities improve dexterity and coordination, essential for neat handwriting. By practicing shapes and letter tracing, children develop fine motor skills, laying a strong foundation for legible and confident writing.

1.3 Building Confidence in Young Writers

Year 1 writing worksheets with creative prompts and simple sentences encourage children to express ideas confidently. Interactive activities, like picture prompts, make writing fun and engaging. Positive reinforcement through clear feedback helps young writers see progress, fostering self-assurance and a love for writing at an early stage.

Types of Year 1 Writing Worksheets

Year 1 writing worksheets include alphabet tracing, simple sentence writing, and creative prompts. They also feature cut-and-paste activities and themed exercises to engage young learners effectively.

2.1 Alphabet Tracing and Formation

Alphabet tracing worksheets help children practice letter shapes, improving fine motor skills. They feature uppercase and lowercase letters with guides, ensuring proper formation. Regular practice builds handwriting confidence and prepares students for spelling and reading success in Year 1.

2.2 Simple Sentence Writing

Simple sentence writing worksheets introduce Year 1 students to basic sentence structure. Activities include sentence completion, word tracing, and picture prompts. These exercises help build grammar skills, encourage creativity, and promote correct punctuation use. They gradually progress from single words to forming short, meaningful sentences, fostering a strong foundation in writing.

2.3 Creative Writing Prompts

Creative writing prompts inspire Year 1 students to express their imagination. Worksheets often include picture-based scenarios or open-ended questions, encouraging students to craft short stories or describe scenes. These activities develop critical thinking and self-expression while aligning with curriculum goals, making writing engaging and enjoyable for young learners.

Key Features of Effective Worksheets

Effective Year 1 writing worksheets feature clear instructions, engaging visuals, and gradual skill progression. They align with curriculum standards, ensuring age-appropriate content that fosters learning and creativity.

3.1 Age-Appropriate Content

Effective Year 1 writing worksheets include age-appropriate content, such as tracing exercises, simple sentences, and creative prompts. These activities are tailored to a child’s developmental stage, ensuring engaging and meaningful learning experiences that align with curriculum goals and foster foundational literacy skills.

3.2 Visual Aids and Engaging Designs

Year 1 writing worksheets often feature colorful visuals, illustrations, and themed designs to captivate young learners. These elements make tasks more enjoyable, helping children stay focused and motivated. Visual aids also guide handwriting practice and sentence structure, ensuring a stimulating and effective learning experience.

3.4 Gradual Progression in Difficulty

Effective Year 1 writing worksheets incorporate a gradual increase in difficulty, starting with simple letter tracing and progressing to forming short sentences. This structured approach ensures children master basic skills before tackling more complex tasks, fostering confidence and a smooth transition to higher-level writing abilities.

Grammar and Spelling Exercises

Year 1 writing worksheets focus on introducing basic grammar and spelling concepts, such as capital letters, full stops, and question marks. They help children understand sentence structure and punctuation, aligning with curriculum standards and supporting skill assessment.

4.1 Capital Letters and Full Stops

Year 1 worksheets emphasize correct usage of capital letters and full stops. Activities include identifying capital letters in names and sentences, and using full stops to end sentences. These exercises help build foundational punctuation skills, essential for clear communication and proper sentence structure in early writing development.

4.2 Question Marks and Exclamation Points

Year 1 worksheets focus on teaching question marks and exclamation points through interactive activities. Children learn to identify and use these punctuation marks in sentences, enhancing their understanding of sentence purpose and tone. Exercises include matching games and writing short sentences, fostering creativity and accuracy in early punctuation skills.

4.3 Basic Sentence Structure

Year 1 writing worksheets introduce children to basic sentence structure, emphasizing subject-verb-object formation. Activities include word ordering, sentence completion, and creative writing prompts. These exercises help students understand how to construct clear, grammatically correct sentences, laying a solid foundation for effective communication and future writing skills.

alignment with Educational Standards

Alignment with Educational Standards

Year 1 writing worksheets align with national curriculum requirements, ensuring skill progression and proper assessment. They cover essential grammar, spelling, and literacy skills, preparing students for educational milestones.

5.1 National Curriculum Requirements

Year 1 writing worksheets are designed to meet National Curriculum standards, focusing on essential skills like capital letters, full stops, question marks, and exclamation points. They align with grammar, spelling, and reading comprehension goals, ensuring students master foundational literacy skills and progress steadily through the curriculum.

5;2 Skill Progression and Assessment

Year 1 writing worksheets support skill progression by introducing grammar, spelling, and sentence structure by grade. They include reading comprehension exercises, sentence completion tasks, and creative writing evaluations to assess understanding and track improvement, ensuring alignment with curriculum goals and identifying areas for additional support.

Interactive and Fun Activities

Engaging activities like cut-and-paste sentence building, picture writing prompts, and seasonal themes make learning exciting. These tools foster creativity, motivation, and a love for writing in young students.

  • Creative tasks encourage imagination and participation.
  • Visual aids and themed worksheets enhance engagement.
  • Interactive exercises make writing a enjoyable experience.
  • 6.1 Cut-and-Glue Sentence Building

    Cut-and-glue activities allow students to physically arrange words into coherent sentences, enhancing their understanding of sentence structure. This hands-on approach improves fine motor skills and makes learning interactive and enjoyable for young writers. It also reinforces grammar and vocabulary while fostering creativity and confidence in their ability to form meaningful sentences.

    6.2 Picture Writing Prompts

    Picture writing prompts inspire creativity by providing visual cues for students to describe or tell stories. These engaging tools improve reading comprehension and vocabulary while fostering imaginative writing skills. They align with curriculum standards and are available in free PDF formats, offering seasonal and themed variations to keep young writers motivated and excited.

    6.3 Seasonal and Themed Worksheets

    Seasonal and themed worksheets make learning engaging by connecting writing activities to holidays, events, or topics like autumn or summer. They feature festive visuals and prompts, such as writing about seasonal experiences or decorating scenes. These worksheets align with educational standards, fostering creativity while keeping lessons relevant and enjoyable for young students.

    Assessing Progress and Understanding

    Worksheets include reading comprehension exercises, sentence completion tasks, and creative writing evaluations to track progress. These tools help identify strengths and areas needing improvement, ensuring aligned skill development and effective assessment strategies for young learners.

    7.1 Reading Comprehension Exercises

    Reading comprehension exercises in Year 1 worksheets involve short passages followed by questions. These activities help students understand text details, sequence of events, and main ideas. They align with curriculum standards, fostering critical thinking and vocabulary skills while providing teachers with insights into students’ grasp of literacy concepts and their ability to interpret written content effectively.

    7.2 Sentence Completion Tasks

    Sentence completion tasks in Year 1 worksheets help students practice grammar, vocabulary, and sentence structure. They often include partial sentences with missing words, encouraging students to fill in the blanks. These exercises enhance reading comprehension and writing skills, while visual aids make the activities engaging and effective for assessing understanding and building confidence in young learners.

    7.3 Creative Writing Evaluation

    Creative writing evaluation in Year 1 involves assessing students’ ability to express ideas imaginatively. Worksheets often include prompts that encourage originality and coherence. Teachers evaluate language use, creativity, and adherence to writing conventions. Visual aids and engaging designs make these tasks enjoyable while providing insights into students’ progress and understanding of creative writing concepts.

    Handwriting Practice Worksheets

    Handwriting practice worksheets for Year 1 focus on letter formation, tracing, and fine motor skills. They include guides for lowercase and uppercase letters, word tracing, and lined paper for neat writing, helping children develop consistency and legibility in their handwriting.

    8.1 Letter Formation Guides

    Letter formation guides in Year 1 worksheets provide step-by-step instructions for writing uppercase and lowercase letters. They include tracing activities, arrows for direction, and spacing for practice, helping children develop consistent and legible handwriting. These guides are essential for improving fine motor skills and ensuring proper letter proportions from an early age.

    8.2 Word Tracing Activities

    Word tracing activities in Year 1 worksheets help children practice writing simple words by tracing dotted letters. These exercises improve letter formation, spacing, and handwriting consistency. They often include guides for direction and pressure, making it easier for young learners to develop fine motor skills and recognize letter patterns in words.

    8.4 Black Line Writing Paper Templates

    Black line writing paper templates provide structured formats with line spacing and margins, guiding students to write neatly. These templates help improve letter formation, spacing, and handwriting consistency. They are often customizable, allowing teachers to create tailored practice sheets for different writing activities, ensuring young learners can practice writing within clear boundaries.

    Additional Resources and Support

    Free PDF downloads, teacher lesson plans, and interactive online activities provide comprehensive support for educators. These resources include customizable templates, creative prompts, and engaging exercises, ensuring a well-rounded approach to teaching writing skills. They align with curriculum standards, offering flexibility and innovation for both teachers and students.

    9.1 Free PDF Downloads

    Free PDF downloads offer a wide range of Year 1 writing worksheets, including alphabet tracing, simple sentences, and creative prompts. These resources are easily accessible and suitable for both home and classroom use. They provide curriculum-aligned activities, ensuring children develop foundational writing skills through engaging and structured exercises.

    9.2 Teacher Lesson Plans and Ideas

    Teacher lesson plans and ideas for Year 1 writing worksheets include creative activities like cut-and-paste exercises, themed writing prompts, and interactive tasks. These resources support skill progression, assessment, and engagement, helping teachers deliver structured and fun lessons that cater to diverse learning styles and curriculum requirements.

    9.3 Interactive Online Activities

    Interactive online activities for Year 1 writing worksheets include animated lessons, sound effects, and gamified exercises. These tools engage students with virtual writing tasks, such as tracing letters or arranging words into sentences. Platforms offer progress tracking, making learning fun and effective while aligning with curriculum standards.

    Year 1 writing worksheets provide a solid foundation for young writers, boosting confidence and skills. Regular practice ensures progress, preparing students for future academic challenges while fostering creativity and enjoyment in learning.

    10.1 Summarizing the Benefits

    Year 1 writing worksheets offer numerous benefits, including improved handwriting, enhanced grammatical understanding, and increased confidence in young writers. They provide structured practice, fostering creativity and alignment with curriculum standards, ensuring a strong foundation for future academic success while making learning engaging and enjoyable.

    10.2 Encouraging Continuous Practice

    Consistent use of Year 1 writing worksheets ensures steady progress in writing skills. Regular practice with alphabet tracing, sentence writing, and creative prompts helps build a strong foundation. Access to free PDFs and interactive activities makes practice engaging and convenient, fostering a habit of regular writing exercise and improved literacy.

    10.3 Preparing for Future Writing Challenges

    Year 1 writing worksheets lay the groundwork for future writing success by introducing foundational skills like grammar, spelling, and creative expression. Regular practice with these tools helps students master capital letters, punctuation, and sentence structure, equipping them to tackle more complex writing tasks with confidence and proficiency in later years.

body beast pdf

The Body Beast PDF is a comprehensive guide for muscle-building and strength training, offering detailed workout schedules, nutrition plans, and tracking tools to help users achieve their fitness goals effectively.

1.1 Overview of the Program

The Body Beast program is a 90-day fitness system designed by Beachbody to help users build muscle and increase strength. It combines intense workouts with a structured nutrition plan, focusing on three phases: Build, Beast, and Lean Beast. Each phase targets different muscle groups, with exercises like supersets and circuits to maximize efficiency. The program emphasizes progressive overload, ensuring consistent muscle growth. Suitable for intermediate lifters, it requires dedication and proper form to achieve optimal results.

1.2 Importance of the Guide

The Body Beast PDF guide is essential for success, providing clear instructions, workout schedules, and nutrition advice. It ensures users follow the program correctly, avoiding common mistakes. Detailed tracking sheets help monitor progress, while meal plans optimize muscle growth. The guide also offers safety tips and injury prevention strategies, making it a vital resource for achieving the program’s goals effectively and safely. Its structured approach helps users stay consistent and motivated throughout their fitness journey.

Phases of the Program

The Build Phase focuses on establishing a strong foundation, improving muscle endurance, and increasing strength through targeted exercises and superset workouts, setting the stage for muscle growth.

2.1 Build Phase

The Build Phase lasts approximately three weeks, focusing on foundational strength and muscle endurance. It introduces supersets and circuits to maximize efficiency. Participants track progress with worksheets, ensuring consistency. Techniques like avoiding failure and daily progression are emphasized. This phase builds a solid base, preparing the body for more intense training in subsequent phases. Proper form and gradual increases in resistance are crucial for safe and effective muscle development during this initial stage.

2.2 Beast Phase

The Beast Phase is designed to enhance hypertrophy and power, typically lasting four weeks. Workouts intensify with increased volume, tempo, and resistance. Techniques like the repeat method and progressive overload are applied. This phase emphasizes supersets and compound movements to target multiple muscle groups. The schedule includes advanced routines for chest, back, and legs, with optional cardio and abs; The goal is to maximize muscle gain and strength, preparing for the final phase of the program. Proper form and recovery are essential to avoid injury.

2.3 Lean Beast Phase

The Lean Beast Phase is the final stage, focusing on fat loss and muscle definition. It lasts approximately three weeks, incorporating high-intensity circuits and active recovery. Workouts target the entire body, emphasizing compound movements to maintain muscle mass while shedding fat. Cardio sessions are optional but recommended. The phase emphasizes proper form and recovery to ensure safe and effective results. This phase is crucial for revealing the muscle definition achieved during the Build and Beast phases.

Workout Schedule

The Body Beast workout schedule is a structured 90-day program divided into three phases: Build, Beast, and Lean Beast. It includes 6 days of workouts per week, with one rest day. The schedule outlines specific exercises, sets, and reps for each day, ensuring progressive overload and muscle growth. It also emphasizes proper form, recovery, and tracking progress to maximize results.

3.1 Build Schedule

The Build Schedule is the first phase of the Body Beast program, lasting approximately three weeks. It focuses on building strength and muscle mass through targeted workouts. Each day concentrates on specific muscle groups, such as chest/tris, legs, back/bis, and shoulders. The schedule includes 6 days of workouts per week, with one rest day. It outlines exercises, sets, and reps, emphasizing progressive overload to stimulate muscle growth. Printable PDF resources, like workout sheets and trackers, are available to monitor progress. Proper form, recovery, and adjusting weights according to fitness levels are crucial for success.

3.2 Beast Schedule

The Beast Schedule is the second phase of the Body Beast program, designed to enhance muscle size and strength. It introduces advanced techniques like supersets and circuits, increasing workout intensity. The schedule spans three weeks, with six workout days focusing on different muscle groups. It includes exercises like bench presses, pull-ups, and squats, with detailed sets and reps. The PDF guide provides workout sheets for tracking progress, ensuring users stay on course. Proper form and gradual weight increases are emphasized to maximize results while minimizing injury risks.

3.3 Lean Beast Schedule

The Lean Beast Schedule focuses on fat loss while maintaining muscle, combining intense workouts with strategic calorie control. It includes a 3-week block structure, targeting specific muscle groups daily. Workouts incorporate supersets and circuits for efficiency, with detailed sets and reps. The PDF guide offers worksheets to track progress, ensuring users stay consistent. This phase emphasizes balanced nutrition and moderate cardio to enhance definition while preserving muscle mass, making it ideal for those seeking a lean, athletic build.

Downloadable PDF Resources

The Body Beast PDF includes detailed workout schedules, exercise trackers, and nutrition guides, providing a comprehensive toolkit for achieving fitness goals. Downloadable resources are easily accessible online.

4.1 What’s Included in the PDF

The Body Beast PDF offers a comprehensive guide, including detailed workout schedules, exercise trackers, and nutrition plans tailored for muscle growth and fat loss. It features workout sheets for tracking progress, meal plans with calorie and macronutrient breakdowns, and programming notes on techniques like supersets and circuits. The PDF also provides worksheets for monitoring gains and adjustments, ensuring a structured approach to achieving fitness goals. This resource is designed to support users throughout the 90-day program.

4.2 How to Download the PDF

The Body Beast PDF is available for free download from various sources, including official websites and fitness forums. Users can access it by searching for “Body Beast Workout Schedule PDF” or similar terms. The file can be downloaded in formats like PDF or TXT. Simply navigate to a trusted site, locate the document, and follow the download instructions. Ensure to verify the source for authenticity to avoid unauthorized versions. This convenient access allows users to start their fitness journey seamlessly.

Nutrition and Eating Plan

The Body Beast PDF provides a structured nutrition plan, emphasizing calorie intake and macronutrient balance to support muscle growth and fat loss during each program phase.

5.1 Calorie Intake and Meal Timing

The Body Beast PDF guides users on tailored calorie intake based on their goals, whether bulking or leaning. It emphasizes meal timing to optimize muscle growth and recovery, suggesting 5-6 balanced meals daily. Caloric needs vary across Build, Beast, and Lean Beast phases, ensuring alignment with training intensity. The plan encourages tracking intake and adjusting portions to maintain progress, providing a clear framework for achieving physique goals effectively.

5.2 Macronutrient Breakdown

The Body Beast PDF provides detailed macronutrient guidelines, focusing on protein for muscle growth, carbohydrates for energy, and fats for overall health. It recommends a balanced ratio tailored to each phase, ensuring optimal fueling for workouts and recovery. The plan emphasizes high-protein intake, with adjustments in carb and fat consumption based on goals, such as bulking or leaning. This structured approach helps users maximize muscle gain and minimize fat storage, aligning nutrition with training intensity for superior results.

Tracking Progress

The Body Beast PDF includes worksheets and trackers to monitor workouts, nutrition, and progress, ensuring users stay consistent and motivated throughout their fitness journey.

6.1 Worksheets and Trackers

The Body Beast PDF provides detailed worksheets and trackers to monitor progress, including exercise logs, weight adjustments, and nutrition planning. These tools help users stay organized and focused, ensuring they follow the program consistently. The trackers allow for daily progress monitoring, helping users adjust their workouts and nutrition plans accordingly. By documenting each session, users can see improvements in strength and muscle growth, staying motivated throughout their fitness journey. This systematic approach ensures accountability and maximizes results.

6.2 Measuring Success

Success in the Body Beast program is measured through muscle gain, strength increases, and fat loss. The PDF guide emphasizes tracking key metrics like weight, body fat percentage, and workout performance. Progress photos and measurements are also recommended to visualize changes. The program’s structured approach ensures gradual improvements, with visible results typically appearing within weeks. Consistency and adherence to the plan are crucial for achieving the desired physique and maintaining long-term success.

Benefits of the Program

The Body Beast program offers significant benefits, including rapid muscle gain, increased strength, and enhanced fat loss. It provides a structured, comprehensive approach to achieving a lean, strong physique.

7.1 Muscle Gain and Strength

The Body Beast program is designed to maximize muscle gain and strength through high-intensity workouts. It incorporates techniques like supersets and circuits to target multiple muscle groups efficiently. Progressive overload is emphasized, gradually increasing weights to challenge muscles and promote growth. The structured routines, combined with proper nutrition, help users achieve noticeable increases in muscle mass and strength, making it an effective choice for those aiming to build a powerful, lean physique.

7.2 Fat Loss and Definition

The Body Beast program also focuses on fat loss and muscle definition, particularly in its Lean Beast phase. By combining high-intensity workouts with a calorie-controlled meal plan, users can shed excess fat while maintaining or even gaining muscle mass. The program’s structured approach ensures visible definition, especially in the later stages, as the body becomes leaner and more toned. This makes it an ideal choice for those seeking both strength and a chiseled physique.

Safety Tips and Precautions

Ensure proper form, warm-up before workouts, and use weights suitable for your fitness level. Consult a professional if needed and stay hydrated throughout the program.

8.1 Proper Form and Technique

Proper form and technique are crucial in Body Beast to prevent injuries and maximize results. Focus on controlled movements, engage the correct muscles, and avoid using momentum. Start with lighter weights to master form before increasing intensity. Pay attention to posture and alignment throughout each exercise. Improper technique can lead to strain or injury, so review the guide and consider professional guidance if needed.

8.2 Injury Prevention

Injury prevention is essential for a safe and effective Body Beast journey. Always warm up before workouts and cool down afterward to prepare and relax muscles. Ensure proper rest days to allow recovery. Start with weights and resistance appropriate for your fitness level, gradually increasing intensity. Avoid sacrificing form for heavier weights, as poor technique can lead to strain. Listen to your body and take extra rest if needed to prevent overtraining or injury.

Final Thoughts

Consistency and patience are key to achieving transformative results with Body Beast. Stay committed, track progress, and embrace the supportive community to unlock your full potential and success.

9.1 Consistency and Patience

Consistency is the backbone of the Body Beast program, requiring regular adherence to workouts and nutrition plans. Patience is equally crucial, as muscle growth and fat loss are gradual processes. The program emphasizes that transformations don’t happen overnight, so staying dedicated and focused on long-term goals ensures success. By maintaining discipline and persistence, users can achieve sustainable results and build a stronger, leaner physique over time.

9.2 Community and Support

The Body Beast program thrives on community and support, offering a network of like-minded individuals to share experiences and motivation. Online forums, social media groups, and live events provide platforms for users to connect, exchange tips, and celebrate progress. The program encourages accountability and camaraderie, fostering a supportive environment that helps users stay motivated and committed to their fitness journey. This collective energy enhances the overall experience, making it easier to achieve goals and maintain consistency.

2014 jeep grand cherokee manual

The 2014 Jeep Grand Cherokee manual is a comprehensive guide covering operation‚ features‚ and maintenance. It details engine performance‚ trim levels‚ advanced technology‚ towing‚ and troubleshooting procedures‚ ensuring optimal vehicle care.

1.1 Overview of the Manual

The 2014 Jeep Grand Cherokee manual is a comprehensive guide detailing vehicle features‚ maintenance‚ and operation. It covers engine options‚ trim levels‚ advanced technology‚ and troubleshooting. Available as a PDF download or printed version‚ the manual ensures owners understand their SUV’s capabilities. With 600-700 pages‚ it provides in-depth instructions for optimal performance and care‚ making it an essential resource for both new and experienced owners.

1.2 Importance of the Manual for Vehicle Maintenance and Operation

The manual is essential for safe and efficient operation of the 2014 Jeep Grand Cherokee. It provides critical information on maintenance schedules‚ troubleshooting‚ and advanced features. By following the manual‚ owners can prevent costly repairs‚ optimize performance‚ and ensure longevity. It also helps drivers understand safety features and operate the vehicle correctly‚ making it a vital resource for both routine care and diagnosing issues.

Key Features and Specifications of the 2014 Jeep Grand Cherokee

The 2014 Jeep Grand Cherokee is a mid-size SUV offering exceptional off-road capability and refined on-road performance. It features multiple trim levels‚ including Laredo‚ Limited‚ and Overland‚ with options like a 3.6L V6 or 5.7L V8 engine. Advanced four-wheel-drive systems and premium interior amenities make it a versatile and luxurious choice.

2.1 Engine Options and Performance

The 2014 Jeep Grand Cherokee offers three engine options: a 3.6L V6 Pentastar‚ delivering 290 horsepower and 260 lb-ft torque‚ and a 5.7L V8 HEMI with 360 horsepower and 390 lb-ft torque for enhanced towing. Additionally‚ an optional 3.0L EcoDiesel V6 provides 240 horsepower and 420 lb-ft torque‚ combining fuel efficiency with robust performance. All engines pair with an 8-speed automatic transmission for smooth shifting and improved efficiency.

2.2 Trim Levels and Available Options

The 2014 Jeep Grand Cherokee is offered in four trim levels: Laredo‚ Limited‚ Overland‚ and Summit. The base Laredo includes essential features like cloth upholstery and a Uconnect infotainment system. Higher trims add luxury amenities such as heated seats‚ navigation‚ and premium audio. Optional upgrades include a Quadra-Trac II 4×4 system‚ adaptive cruise control‚ and a dual-pane panoramic sunroof for enhanced comfort and capability.

Maintenance and Service Schedule

Regular maintenance is crucial for the 2014 Jeep Grand Cherokee. The manual outlines schedules for oil changes‚ tire rotations‚ and system inspections to ensure optimal performance and longevity.

3.1 Recommended Maintenance Intervals

Regular maintenance ensures the 2014 Jeep Grand Cherokee performs optimally. The manual recommends oil changes every 5‚000 to 7‚500 miles‚ tire rotations every 7‚500 miles‚ and brake inspections every 10‚000 miles. Spark plug replacement is suggested around 100‚000 miles‚ while belt replacements are recommended every 105‚000 miles. Following these intervals helps prevent mechanical issues and ensures smooth operation for both on-road and off-road adventures.

3.2 DIY Maintenance Tips from the Manual

The 2014 Jeep Grand Cherokee manual provides DIY maintenance tips to keep your vehicle in top shape. Regularly check and maintain tire pressure‚ inspect air filters for cleanliness‚ and monitor fluid levels. Replace the engine oil every 5‚000 to 7‚500 miles using the recommended grade. Inspect battery terminals for corrosion and clean them as needed. These simple tasks help ensure reliable performance and longevity.

Troubleshooting Common Issues

The manual guides owners through diagnosing issues like error codes and dashboard warnings. It provides step-by-step solutions for common problems‚ ensuring quick and effective resolutions.

4.1 Diagnostic Procedures

The manual outlines detailed diagnostic procedures for identifying issues. It covers error codes‚ warning lights‚ and system checks. Owners can use the Uconnect infotainment system to retrieve codes and diagnose problems. The guide also explains how to perform on-board diagnostics and interpret results for precise troubleshooting. This section helps owners address common issues like engine performance and electrical system malfunctions efficiently.

4.2 Resetting Warning Lights and Error Codes

The manual provides clear steps for resetting warning lights and error codes. Owners can use the Uconnect infotainment system or an OBD-II scanner to clear codes. After addressing the issue‚ turning the ignition off and on can reset lights. Some codes may require professional tools or dealership assistance for proper clearance. Always consult the manual before attempting resets to avoid system errors. Regular checks ensure optimal vehicle performance and safety.

Advanced Features and Technology

The 2014 Jeep Grand Cherokee features advanced technologies like the Uconnect infotainment system and innovative four-wheel-drive systems‚ enhancing both on-road comfort and off-road capability.

5.1 Uconnect Infotainment System

The 2014 Jeep Grand Cherokee’s Uconnect Infotainment System is a central component of its advanced technology features. It offers a user-friendly touchscreen interface‚ voice command functionality‚ and seamless Bluetooth connectivity for hands-free calls and music streaming. The system also supports USB ports and auxiliary inputs‚ ensuring compatibility with various devices. The manual provides detailed guidance on setting up and troubleshooting the system‚ ensuring optimal performance and functionality.

5.2 Four-Wheel-Drive Systems Explained

The 2014 Jeep Grand Cherokee features advanced four-wheel-drive systems‚ including the Quadra-Trac I and Quadra-Trac II options. These systems provide enhanced traction and control on various terrains‚ from paved roads to challenging off-road conditions. The manual details how to engage 4WD modes‚ including the automatic and low-range settings‚ ensuring optimal performance and stability. Understanding these systems is crucial for maximizing the vehicle’s off-road capabilities and maintaining safety.

Towing Capacity and Guidelines

The 2014 Jeep Grand Cherokee manual provides essential details on towing capacity and proper techniques. It emphasizes consulting the manual for maximum towing limits and ensuring safe towing practices to avoid damage and maintain vehicle performance.

6.1 Maximum Towing Capacity

The 2014 Jeep Grand Cherokee manual specifies that the maximum towing capacity varies by engine and configuration. Equipped with the 5.7L V8 engine and appropriate axle ratio‚ it can tow up to 7‚400 pounds. The EcoDiesel engine offers similar capabilities‚ while the 3.6L V6 may have a lower limit. Proper equipment‚ weight distribution‚ and adherence to manufacturer guidelines are essential for safe towing. Always check the manual for specific engine and axle configurations to ensure safe and effective towing practices.

6.2 Proper Towing Techniques

Proper towing techniques for the 2014 Jeep Grand Cherokee involve ensuring the trailer is securely attached‚ using a weight-distributing hitch‚ and verifying tire pressure matches the load. Always follow the vehicle’s towing guidelines‚ use trailer brakes if equipped‚ and maintain a safe speed. Consult the manual for specific hitch and ball mount recommendations to ensure safe and stable towing performance. Safety is paramount to prevent accidents and damage.

Accessories and Customization Options

The 2014 Jeep Grand Cherokee offers factory-approved accessories like roof racks and lift kits‚ along with popular aftermarket modifications such as performance upgrades and interior customizations‚ enhancing functionality and personal style.

7.1 Factory-Approved Accessories

The 2014 Jeep Grand Cherokee offers a wide range of factory-approved accessories designed to enhance functionality and style. These include roof racks‚ cargo organizers‚ lift kits‚ and off-road lighting. Accessories are specifically engineered to fit seamlessly with the vehicle’s design and performance. They can be purchased through official Jeep dealers or authorized online retailers‚ ensuring quality and compatibility. Adding these accessories can personalize the SUV while maintaining its rugged capabilities and warranty coverage.

7.2 Popular Aftermarket Modifications

Popular aftermarket modifications for the 2014 Jeep Grand Cherokee include lift kits for enhanced off-road clearance‚ high-performance tires for improved traction‚ and engine tuning for increased power. Owners also opt for custom bumpers and lighting upgrades to personalize their vehicle’s appearance and functionality. These modifications enhance off-road capabilities‚ boost towing capacity‚ and offer a more tailored driving experience‚ meeting individual preferences and specific adventure needs.

Downloading and Accessing the Manual

The 2014 Jeep Grand Cherokee manual can be downloaded from official sources or accessed online as a PDF. Ensure you verify the source for authenticity and clarity.

8.1 Official Sources for the Manual

The 2014 Jeep Grand Cherokee manual can be downloaded from Jeep’s official website or authorized dealerships. Additional sources include TechAuthority and eBay‚ which provide verified PDF versions. Ensure authenticity by accessing through trusted platforms like Chrysler Group LLC or Jeep’s customer service portal. For hard copies‚ contact official distributors or visit certified retailers. Always verify the source to avoid unofficial or incomplete versions.

8.2 Tips for Navigating the PDF Version

Navigate the 2014 Jeep Grand Cherokee manual PDF by using the bookmarks panel for quick access to sections. Utilize the search function to find specific topics instantly. Ensure your PDF viewer is updated for optimal performance. Print selected pages for convenience. Familiarize yourself with hyperlinked indexes to jump between chapters effortlessly. Use zoom tools for detailed viewing of diagrams and charts. Save frequently accessed pages for easy reference.

Additional Resources and Support

Explore online forums and communities for peer advice and troubleshooting. Contact Jeep Customer Service for direct assistance. Visit eBay for a wide selection of manuals and guides. Use official websites for verified information and downloads. Check local dealerships for workshops and expert consultations. Access digital libraries for comprehensive repair and maintenance guides.

9.1 Online Forums and Communities

Online forums and communities offer a wealth of information and support for 2014 Jeep Grand Cherokee owners. Websites like eBay and specialized Jeep forums provide peer advice‚ troubleshooting tips‚ and shared experiences. These platforms are ideal for discussing modifications‚ maintenance‚ and repair issues. Enthusiasts and experts often share detailed guides and solutions‚ making them invaluable resources for optimizing your vehicle’s performance and addressing common concerns.

9.2 Contacting Jeep Customer Service

For direct assistance‚ contact Jeep Customer Service via phone at 1-877-899-0438 (U.S.) or 1-800-387-1143 (Canada). Visit their official website for support options‚ including live chat and email. Representatives are available to address concerns‚ provide manual requests‚ and offer technical assistance. This service ensures owners receive official guidance tailored to their 2014 Jeep Grand Cherokee‚ enhancing ownership experience and resolving issues promptly.

instructions for vax steam cleaner

Welcome to the comprehensive guide for your Vax Steam Cleaner. This manual provides detailed instructions to help you assemble‚ operate‚ and maintain your appliance effectively. Discover how to unlock its full potential for a deeper‚ healthier clean across various surfaces. Follow these step-by-step guidelines to ensure safety‚ efficiency‚ and optimal performance. Whether you’re a first-time user or a seasoned cleaner‚ this guide will walk you through every process seamlessly.

Overview of the Vax Steam Cleaner

The Vax Steam Cleaner is a versatile and powerful cleaning appliance designed for multi-purpose use. It combines the functionality of a steam mop and handheld cleaner‚ offering a comprehensive solution for various surfaces. Lightweight and maneuverable‚ it simplifies cleaning tasks‚ from hard floors to carpets. With features like adjustable steam control and eco-friendly operation‚ it ensures efficient and hygienic cleaning. The Vax Steam Cleaner is ideal for households seeking a reliable and user-friendly tool to maintain a clean and healthy environment. Its innovative design makes it a valuable addition to any home cleaning routine.

Importance of Following the User Manual

Adhering to the user manual is crucial for safe and effective operation of your Vax Steam Cleaner. It provides essential guidelines to avoid damage‚ ensure optimal performance‚ and maintain warranty validity. The manual outlines proper assembly‚ usage‚ and maintenance procedures‚ reducing the risk of accidents and prolonging the appliance’s lifespan. By following the instructions‚ you can troubleshoot common issues and maximize cleaning efficiency. Always refer to the manual for specific model details‚ as improper use may lead to malfunctions or safety hazards. Compliance ensures a seamless and satisfactory cleaning experience for all users.

Understanding Your Vax Steam Cleaner

Your Vax Steam Cleaner is a versatile appliance designed for efficient cleaning. It combines a steam mop and handheld cleaner‚ offering a lightweight‚ maneuverable design for various surfaces.

Key Components and Accessories

Your Vax Steam Cleaner comes with essential components and accessories to enhance cleaning efficiency. These include an elongated curved nozzle‚ steel brush‚ large brush‚ and microfiber cloths. Additional accessories like a wall-mounting kit and hard water filter are also provided. Each attachment serves specific cleaning tasks‚ ensuring versatility for different surfaces. The accessories are designed to optimize performance and adapt to various cleaning needs‚ making your Vax Steam Cleaner a comprehensive solution for home maintenance.

Technical Specifications and Features

The Vax Steam Cleaner is equipped with a powerful 1300W motor‚ offering quick heating in just 30 seconds. Its 330ml water tank allows up to 20 minutes of continuous steam cleaning. Features include multiple steam settings‚ a detachable handheld unit‚ and a variety of interchangeable attachments. The cleaner also includes a hard water filter and anti-scale protection for longevity. Designed for efficiency and versatility‚ these technical specifications ensure a superior cleaning experience across diverse surfaces and tasks.

Preparation Before First Use

Before using your Vax Steam Cleaner‚ unpack and inspect the appliance for any damage or missing parts. Wash the filters and attachments in warm water to remove any manufacturing residue. Ensure the water tank is filled with distilled or tap water‚ avoiding additives. Familiarize yourself with the user manual to understand safety guidelines and operational procedures. Allow the cleaner to heat up for the recommended time before starting your cleaning session. Proper preparation ensures optimal performance and longevity of your steam cleaner.

Assembly and Initial Setup

Begin by carefully unpacking and assembling the Vax Steam Cleaner according to the manual. Attach all components securely and ensure no parts are damaged or missing. Follow the guide to connect accessories properly and prepare the unit for first use.

Step-by-Step Assembly Instructions

Begin by unpacking the Vax Steam Cleaner and laying out all components. Attach the handle to the main unit securely‚ ensuring it clicks into place. Next‚ connect the water tank by aligning it with the base and twisting until it locks. If your model includes a handheld unit‚ detach it by pressing the release button. Attach desired cleaning heads‚ such as the floor nozzle or upholstery brush‚ by aligning the connectors and securing with a twist. Ensure all parts are tightly fitted before use. Refer to your manual for model-specific assembly details.

Checking for Damages and Missing Parts

Before using your Vax Steam Cleaner‚ carefully inspect the appliance and accessories for any visible damage. Check the water tank‚ steam hose‚ and cleaning heads for cracks or dents. Ensure all parts‚ such as brushes‚ nozzles‚ and adapters‚ are included by cross-referencing with the manual. If any components are missing or damaged‚ contact customer support immediately. This step ensures safety and optimal performance‚ preventing potential issues during operation. Proper inspection helps maintain the longevity of your steam cleaner and guarantees a satisfying cleaning experience.

Operating the Vax Steam Cleaner

Operating your Vax Steam Cleaner is straightforward. Use adjustable steam settings and various attachments for different surfaces. Always follow safety guidelines for optimal cleaning results.

Basic Cleaning Modes and Settings

Your Vax Steam Cleaner offers multiple cleaning modes to suit various surfaces. Use low steam for delicate areas‚ medium for general cleaning‚ and high for tough stains. Adjust the steam pressure via the control dial or button‚ depending on your model. Ensure the correct attachment is fitted for the surface‚ such as the floor nozzle for hard floors or the upholstery brush for fabrics. Always pre-test a small area to avoid damage. Refer to your manual for specific mode recommendations and optimal results for different cleaning tasks.

Using Different Attachments for Various Surfaces

Your Vax Steam Cleaner comes with a variety of attachments designed for specific surfaces. Use the floor nozzle for hard floors‚ the upholstery brush for fabrics‚ and the crevice tool for tight spaces. For tougher stains‚ attach the scrub brush or stainless steel brush. Always match the attachment to the surface to avoid damage and ensure effective cleaning. Refer to your manual for guidance on which attachment suits each task. Experiment with different combinations to achieve the best results for your cleaning needs.

Safety Precautions While Operating

Always prioritize safety when using your Vax Steam Cleaner. Keep children and pets away while operating the device. Avoid touching hot surfaces‚ as they can cause burns. Ensure the cleaner is placed on a stable‚ heat-resistant surface. Never leave it unattended while in use. Store the appliance out of reach when not in use‚ ensuring all parts are cool and dry. Avoid using damaged cables or attachments‚ as they may pose a safety risk. For detailed safety guidelines‚ refer to your user manual to ensure safe and effective operation.

Maintenance and Care

Regularly clean and dry the steam cleaner to prevent mineral buildup. Empty water tanks after use and store the appliance in a cool‚ dry place. Perform routine checks on filters and accessories to ensure optimal performance. Refer to your user manual for specific maintenance instructions tailored to your Vax model.

Cleaning and Drying the Steam Cleaner

After each use‚ empty the water tank and wipe it clean with a soft cloth. Regularly clean the steam nozzle and filters to prevent mineral buildup. For tough stains‚ mix water and white vinegar to rinse the tank; Allow all parts to air-dry completely to avoid mold growth. Store the cleaner in a cool‚ dry place to maintain its performance and longevity. Always refer to your user manual for specific cleaning instructions tailored to your Vax model.

Replacing or Emptying Water Tanks

Regularly empty the water tank after each use to prevent mineral buildup. Rinse the tank with fresh water and a small amount of white vinegar to maintain cleanliness. If replacing‚ ensure the new tank is compatible with your Vax model. Always refer to the manual for specific instructions on removing and installing the tank. After emptying‚ dry the tank thoroughly to avoid mold growth. Proper maintenance ensures optimal performance and extends the lifespan of your steam cleaner.

Troubleshooting Common Issues

Identify and resolve issues like low steam output or malfunctioning parts by referring to the manual. Check for blockages‚ empty water tanks‚ and ensure proper assembly for optimal performance.

Identifying and Resolving Operational Problems

Common issues with your Vax steam cleaner may include low steam output‚ water leaks‚ or malfunctioning attachments. Check for blockages in the steam hose or nozzle‚ and ensure the water tank is properly filled. If the machine is not producing steam‚ verify that the power button is functioning and the water filter is clean. For leaks‚ inspect connections and tighten any loose parts. Refer to the manual for specific error codes and solutions. Regular maintenance‚ such as cleaning filters and drying the appliance‚ can prevent many issues. Always follow the manufacturer’s guidelines for troubleshooting to ensure optimal performance and longevity.

Understanding Error Indicators and Solutions

Your Vax steam cleaner may display error indicators such as flashing lights or specific codes to signal issues. Consult the user manual for a list of error codes and their meanings. Common issues include an empty water tank‚ blockages‚ or overheating. If the steam output is low‚ check for kinks in the hose or scale buildup in the boiler. For error codes‚ restart the machine or reset it as instructed. Regular descaling and cleaning can prevent many problems. Always refer to the manual for model-specific solutions to ensure your appliance runs smoothly and efficiently. Proper maintenance extends its lifespan and performance.

Additional Tips for Effective Cleaning

Preheat surfaces before steaming‚ use microfiber cloths for better results‚ and clean in sections to avoid missing spots. Regularly inspect and clean filters for optimal performance.

Optimizing Steam Pressure for Different Surfaces

Adjust steam pressure according to surface type. For delicate surfaces like hardwood or carpets‚ use lower steam settings to avoid damage. Increase pressure for tougher surfaces like tiles or grout. Always pre-test a small area. Use the steam cleaner’s adjustable control to customize output. Hard floors may require continuous steam‚ while upholstery needs intermittent bursts. Refer to your user manual for specific recommendations. Proper pressure adjustment ensures effective cleaning and protects your surfaces from damage. Experiment to find the ideal balance for each area of your home.

Using Cleaning Solutions Safely

Only use cleaning solutions recommended by Vax to ensure safety and effectiveness. Always check the user manual for compatible products. Dilute solutions as instructed to avoid damaging surfaces or clogging the machine. Never use bleach or abrasive chemicals‚ as they may harm the appliance or release harmful fumes. For best results‚ test a small area first. After use‚ rinse and clean the water tank thoroughly to remove any solution residue. Follow these guidelines to maintain your steam cleaner’s performance and ensure a safe‚ efficient cleaning experience.

curriculum and instruction certificate

The Curriculum and Instruction Certificate empowers educators with advanced skills in curriculum design, instructional strategies, and assessment methods. It equips professionals to create engaging, standards-based educational experiences.

1.1 Definition and Overview

The Curriculum and Instruction Certificate is a specialized program designed to equip educators with advanced knowledge and skills in curriculum development, instructional strategies, and assessment methods. It focuses on preparing professionals to design, implement, and evaluate educational content, ensuring it aligns with academic standards and meets diverse student needs. The certificate program is typically shorter than a full degree, offering a concentrated learning experience. It caters to educators, including teachers and administrators, who aim to enhance their expertise in creating effective learning environments. The program emphasizes practical application, enabling participants to apply their knowledge directly in classrooms or educational settings. Its flexible format often includes online options, making it accessible to working professionals. By focusing on curriculum design and instructional leadership, the certificate supports educators in advancing their careers and improving student outcomes.

1.2 Purpose and Target Audience

The primary purpose of the Curriculum and Instruction Certificate is to enhance educators’ expertise in curriculum development, instructional strategies, and educational leadership. It is designed for practicing teachers, administrators, and education professionals seeking to advance their careers or transition into specialized roles such as curriculum specialists or instructional coaches. The program targets individuals who aim to improve student outcomes by creating engaging, standards-aligned learning experiences. It is particularly beneficial for those interested in leadership roles or advanced instructional practices. By focusing on practical skills and real-world application, the certificate supports educators in meeting the evolving demands of modern education and fostering innovation in their professional settings.

Types of Curriculum and Instruction Certificates

The Curriculum and Instruction Certificate is offered in various forms, including Graduate, Post-Master’s, and Executive options, catering to diverse educational and professional needs of educators.

2.1 Graduate Certificate in Curriculum and Instruction

The Graduate Certificate in Curriculum and Instruction is a 9-12 credit program designed for educators seeking to enhance their teaching and leadership skills. Offered online, it focuses on developing standards-based curricula, instructional strategies, and assessment methods. This program is ideal for those not pursuing a master’s degree but wanting to expand their professional expertise. It equips participants with the tools to create engaging lesson plans and effectively implement educational programs. The certificate is tailored for teachers aiming to advance their classroom practices and take on leadership roles in curriculum development. It emphasizes practical application, ensuring graduates are well-prepared to meet the demands of modern education.

2.2 Post-Master’s Certificate in Curriculum and Instruction

The Post-Master’s Certificate in Curriculum and Instruction is designed for educators who have already earned a master’s degree and seek advanced specialization. This program focuses on refining skills in curriculum development, instructional leadership, and educational strategies. It is tailored for those aiming to enhance their expertise in creating and implementing effective educational programs. The certificate often includes coursework in curriculum mapping, assessment techniques, and program evaluation. Offered online, it provides flexibility for working professionals. Graduates gain the ability to lead curriculum initiatives and influence educational outcomes, making it ideal for those aspiring to roles such as curriculum specialists or instructional leaders. This program builds on prior knowledge to deepen professional impact.

2.3 Executive Certificate in Curriculum and Instruction

The Executive Certificate in Curriculum and Instruction is a specialized program tailored for education professionals seeking advanced training in curriculum development and leadership. Offered fully online, it provides flexibility for those balancing professional responsibilities. The program focuses on enhancing skills in curriculum planning, instructional strategies, and educational leadership. It prepares graduates to address complex educational challenges and take on leadership roles. Designed for busy professionals, this certificate offers a concise yet comprehensive curriculum, ensuring practical application of knowledge. By completing this program, educators can advance their careers, contributing effectively to educational innovation and excellence.

Curriculum and Skills

The Curriculum and Instruction Certificate focuses on developing essential skills in curriculum design, instructional strategies, and assessment methods, preparing educators to enhance teaching effectiveness and student learning outcomes.

3.1 Curriculum Development and Design

Curriculum development and design are central to the Curriculum and Instruction Certificate, focusing on creating effective, standards-based educational content. Students learn to apply strategic planning and curriculum mapping techniques to align learning objectives with instructional materials. This involves analyzing educational standards, integrating technology, and adapting curricula for diverse learner needs. The process emphasizes the creation of engaging, student-centered lessons that foster deeper understanding and critical thinking. By mastering these skills, educators can design curricula that meet the demands of modern classrooms and prepare students for future challenges. The certificate program equips professionals with the tools to develop, implement, and evaluate curricula effectively.

3.2 Instructional Strategies and Best Practices

The Curriculum and Instruction Certificate emphasizes advanced instructional strategies and best practices to enhance teaching effectiveness. Participants explore evidence-based methodologies, such as project-based learning, differentiated instruction, and technology integration, to engage diverse learners. The program highlights techniques for fostering active participation, critical thinking, and collaborative learning environments. Educators learn to adapt strategies to meet the needs of varied student populations, including those with special needs or English language learners. By mastering these approaches, professionals can create dynamic, inclusive classrooms that promote academic success and lifelong learning. These skills are essential for modern educators aiming to inspire and motivate students in an ever-evolving educational landscape.

3.3 Assessment and Evaluation Methods

The Curriculum and Instruction Certificate focuses on developing expertise in assessment and evaluation methods to measure student learning effectively. Participants learn to design and implement various assessment tools, including formative and summative evaluations, to align with curriculum goals. The program emphasizes the use of data-driven decision-making to refine instructional practices and improve student outcomes. Educators explore strategies for creating rubrics, conducting performance assessments, and using technology-enhanced evaluation methods. These skills enable professionals to assess student progress accurately, identify areas for improvement, and tailor instruction to meet diverse learning needs. By mastering assessment techniques, educators can foster a culture of continuous improvement in educational settings.

Specializations and Career Outcomes

The Curriculum and Instruction Certificate offers specializations in curriculum design, instructional technology, and educational leadership, preparing professionals for roles like curriculum specialists, instructional coaches, and educational consultants.

4.1 Specializations Offered

The Curriculum and Instruction Certificate offers diverse specializations, allowing educators to tailor their expertise to specific educational needs. These include curriculum design, instructional technology, educational leadership, and special education. Each specialization provides in-depth training, enabling professionals to address contemporary challenges in education effectively. For instance, curriculum design focuses on creating standards-based curricula, while instructional technology emphasizes integrating digital tools for enhanced learning experiences. Educational leadership prepares individuals for administrative roles, and special education equips them to support diverse learners. These specializations ensure that certificate holders are well-prepared to meet the evolving demands of educational settings, whether in K-12, higher education, or informal learning environments.

4.2 Career Opportunities for Certificate Holders

Earning a Curriculum and Instruction Certificate opens doors to various career opportunities in education. Graduates can pursue roles such as curriculum specialists, instructional coordinators, or educational consultants. They may also advance into leadership positions, such as PK-12 supervisors of curriculum and instruction or building principals. Additionally, professionals can work in higher education, corporate training, or non-profit organizations focused on educational development. The certificate equips individuals with the skills to design and implement effective curricula, making them valuable assets in diverse educational settings. It also prepares them to influence teaching practices and contribute to the professional development of educators, enhancing student outcomes across all levels of education.

Obtaining the Certificate

The Curriculum and Instruction Certificate is offered online or on-campus, requiring a master’s degree for eligibility. Students must pass all coursework with a grade of B or higher.

5.1 Eligibility and Admission Requirements

To be eligible for the Curriculum and Instruction Certificate, applicants typically need a bachelor’s or master’s degree in education or a related field, with a minimum GPA of 3.0. Some programs require prior teaching experience, while others may ask for letters of recommendation or transcripts. Standardized test scores, such as the GRE, may be required but are often waived for certificate programs. Admission requirements vary by institution, so it’s essential to check specific program details. Online and on-campus options are available, offering flexibility for working professionals. Ensuring all prerequisites are met is crucial for a smooth admission process.

5.2 Program Formats (Online vs. On-Campus)

Curriculum and Instruction Certificate programs are offered in both online and on-campus formats, catering to diverse learner needs. Online programs provide flexibility, allowing professionals to balance work and study, often with self-paced coursework. On-campus programs offer face-to-face interactions, hands-on experiences, and direct access to faculty. Some institutions offer hybrid models, blending online and in-person learning. Online formats are ideal for those seeking convenience, while on-campus options suit those preferring traditional classroom settings. Both formats typically require 9–12 credit hours and are designed to accommodate working educators. The choice depends on personal preferences, learning style, and professional commitments, ensuring accessibility for all aspiring educators.

Key Considerations for Prospective Students

Prospective students should evaluate program flexibility, accreditation, and alignment with career goals. Ensure the certificate aligns with professional aspirations and institutional reputation for quality education.

6.1 Institutional Requirements and Accreditation

Prospective students must verify the institution’s accreditation status, as it ensures program quality and recognition. Look for regional accreditation, which is crucial for transfer credits and career opportunities. Additionally, review admission requirements such as minimum GPA, prerequisite courses, and prior educational degrees. Some programs may require teaching experience or specific certifications. Ensure the institution aligns with your career goals and offers the desired program format, whether online or on-campus. Accreditation from recognized bodies like the Council for the Accreditation of Educator Preparation (CAEP) adds credibility to the certificate. Lastly, consider the institution’s reputation, faculty expertise, and support services to make an informed decision.

Program Purpose and Benefits

The Curriculum and Instruction Certificate enhances professional skills, preparing educators for leadership roles and equipping them with tools to design and implement effective educational programs.

7.1 Preparing Educators for Leadership Roles

The Curriculum and Instruction Certificate is designed to empower educators with the advanced knowledge and skills needed for leadership positions in educational settings. By focusing on curriculum development, instructional strategies, and assessment methods, the program prepares individuals to take on roles such as curriculum specialists, instructional coaches, and educational administrators. Participants gain expertise in designing standards-based curricula, leading professional development initiatives, and fostering collaborative learning environments. The certificate program emphasizes practical application, allowing educators to immediately implement their learning in real-world contexts. This equips them to drive educational innovation and effectively mentor colleagues, ultimately contributing to improved student outcomes and institutional success.

7.2 Enhancing Professional Skills and Knowledge

The Curriculum and Instruction Certificate is tailored to enhance educators’ professional competencies, equipping them with cutting-edge strategies for curriculum design, instructional delivery, and student assessment. By engaging with evidence-based practices, participants refine their ability to create engaging, student-centered learning experiences. The program emphasizes the development of critical thinking, problem-solving, and communication skills, enabling educators to effectively address diverse student needs. Additionally, the certificate fosters a deeper understanding of educational technologies and innovative teaching methodologies. This advanced training not only strengthens an educator’s expertise but also prepares them to adapt to evolving educational standards, ensuring they remain at the forefront of their field and deliver high-quality instruction.

cars test for autism pdf

The Childhood Autism Rating Scale (CARS) is a widely used observational tool for assessing autism spectrum disorder (ASD) in children. It evaluates behavioral traits to determine autism severity, aiding in accurate diagnosis and intervention planning.

Overview of the Childhood Autism Rating Scale (CARS)

The Childhood Autism Rating Scale (CARS) is a widely used diagnostic tool designed to assess autism spectrum disorder (ASD) in children. It evaluates behavioral traits across 15 key areas, including social interaction, communication, and emotional response. The scale helps clinicians determine the severity of autism, ranging from mild to severe. CARS is based on clinical observations and requires minimal equipment, making it accessible for professionals worldwide. Its simplicity and reliability have made it a cornerstone in autism diagnosis and intervention planning. The test is often used alongside other assessments to ensure comprehensive evaluation. CARS has been adapted for cultural and international use, ensuring its applicability across diverse populations. It remains a vital resource for understanding and addressing autism spectrum traits effectively.

Importance of the CARS Test in Autism Diagnosis

The CARS test plays a crucial role in autism diagnosis by providing a standardized method to assess autism spectrum disorder (ASD) in children. It helps clinicians identify the severity of symptoms, ranging from mild to severe, which is essential for developing appropriate intervention plans. The test’s reliability and validity make it a trusted tool for early diagnosis, enabling timely intervention and improving outcomes for children with ASD. By evaluating key behavioral areas, CARS aids in distinguishing autism from other developmental disorders, ensuring accurate diagnoses. Its widespread use and adaptability across cultures have made it a cornerstone in autism assessment, supporting both clinical and educational decision-making worldwide.

History and Development of the CARS Test

The Childhood Autism Rating Scale (CARS) was created in 1988 by Schopler, Reichler, and Renner, later updated to CARS-2 for improved assessment accuracy.

Creation and Evolution of the CARS Assessment Tool

The Childhood Autism Rating Scale (CARS) was first developed in 1988 by Schopler, Reichler, and Renner to provide a standardized method for assessing autism symptoms. The original CARS was based on clinical observations of behaviors associated with autism, focusing on 15 key areas. Over time, the tool evolved to improve its diagnostic accuracy and applicability. In 2016, the updated version, CARS-2, was introduced, incorporating new scoring criteria and severity levels. The revised tool also added a Questionnaire for Parents or Caregivers to gather additional insights. This evolution ensured the CARS remained a reliable and culturally adaptable instrument for autism assessment worldwide, reflecting advancements in understanding ASD.

Differences Between CARS and CARS-2

The original CARS and its updated version, CARS-2, share the same purpose of assessing autism spectrum disorder (ASD) but differ in several key aspects. CARS-2 introduces refined scoring criteria, enhancing diagnostic accuracy and better differentiating between severity levels. It also includes an additional unscored section, the Questionnaire for Parents or Caregivers, which provides deeper insights into a child’s behavior. Furthermore, CARS-2 incorporates updated norms and improved reliability, making it more effective in diverse clinical settings. These enhancements ensure that CARS-2 remains a robust tool for accurately diagnosing and assessing ASD in children, reflecting modern understanding of the disorder and improving intervention strategies.

Structure of the CARS Test

The CARS test assesses autism through 15 observational items, evaluating behaviors like social interaction and communication. Scoring determines severity levels, aiding diagnosis and intervention planning.

Key Components and Sections of the CARS Assessment

The CARS assessment consists of 15 key components, each evaluating specific behavioral aspects such as social interaction, verbal and nonverbal communication, and repetitive behaviors. These sections are designed to observe and rate the severity of autism traits. Each item is scored on a 4-point scale, from “normal” to “severely abnormal,” providing a comprehensive overview of the child’s behavior. The assessment also includes an unscored section for parent or caregiver input, offering additional insights into the child’s behavior outside clinical settings. This structured approach ensures a thorough evaluation, aiding in accurate diagnosis and tailored intervention strategies. The CARS test is widely recognized for its reliability and validity in assessing autism spectrum disorder across diverse populations.

Scoring Criteria and Interpretation of Results

The CARS assessment uses a 4-point scoring scale for each of its 15 items, ranging from “normal” (1 point) to “severely abnormal” (4 points). The total score ranges from 15 to 60, with higher scores indicating greater autism severity. Interpretation categories include: 15-30 points (no autism), 31-37 points (mild autism), 38-45 points (moderate autism), and 46-60 points (severe autism). The CARS-2 version introduced a standardized scoring system, improving reliability. Clinicians interpret scores alongside behavioral observations to diagnose autism spectrum disorder (ASD) and assess its severity. Accurate interpretation requires clinical expertise to ensure reliable results, which are essential for developing appropriate intervention plans tailored to the child’s needs.

Role of Clinician Observation in the CARS Test

Clinician observation is a cornerstone of the CARS test, as it relies on skilled professionals to assess and rate a child’s behaviors accurately. The clinician evaluates 15 key areas, such as social interaction, communication, and emotional response, through direct observation and caregiver input. This observational approach ensures that subtle behavioral traits are captured, which are critical for an accurate diagnosis. The clinician’s expertise is essential in interpreting behaviors and assigning scores, as the test requires a deep understanding of autism spectrum disorder (ASD). While the test is structured, clinical judgment plays a vital role in ensuring reliable and valid results, making the CARS test a powerful diagnostic tool when administered by trained professionals.

Clinical Applications of the CARS Test

The CARS test is widely used in clinical settings for diagnosing autism and assessing its severity. It aids professionals in developing targeted intervention strategies, ensuring personalized care plans for children with ASD.

Using CARS for Autism Diagnosis and Severity Assessment

The Childhood Autism Rating Scale (CARS) is a crucial tool for diagnosing autism spectrum disorder (ASD) and assessing its severity. It evaluates 15 key behavioral areas, such as social interaction, communication, and emotional response, through clinician observation. The test assigns scores ranging from 1 to 4 for each category, with higher scores indicating more severe symptoms. Based on the total score, individuals are categorized into three groups: no autism, mild-to-moderate autism, or severe autism. This assessment aids professionals in creating tailored intervention plans, ensuring effective support for children with ASD. The CARS test is widely recognized for its reliability and validity in clinical settings, making it a cornerstone in autism diagnosis and management.

Cultural and International Adaptations of the CARS Test

The Childhood Autism Rating Scale (CARS) has been adapted for use in diverse cultural and international contexts, ensuring its applicability across different populations; Translated into multiple languages, the test maintains its reliability and validity, making it a global tool for autism assessment. Cultural adaptations focus on ensuring sensitivity to local norms and behaviors, while retaining the core assessment criteria. For instance, the CARS-2 has been validated for use in countries like Iran, demonstrating its universal relevance; This adaptability allows clinicians worldwide to accurately diagnose and assess autism severity, fostering consistent and equitable care. The availability of the CARS test in PDF format further facilitates its international use, enabling widespread access for professionals and researchers.

Accessing the CARS Test in PDF Format

The CARS test is widely available in PDF format, accessible through platforms like Project Gutenberg and Scribd. Ensure proper authorization and adhere to copyright laws when downloading.

Where to Download the CARS Test PDF

To obtain the CARS test in PDF format, several reputable sources are available. The test can be downloaded from platforms like Project Gutenberg and Scribd, which offer free access to various documents. Additionally, educational websites and repositories may provide the CARS test PDF for professional use. For legal and safe downloading, it is advisable to purchase the test from the official publisher or authorized distributors. Specific websites such as rst6-livesite.rschooltoday.com and northlandsped.org have been mentioned as potential sources. Always ensure that the download is from a credible source to avoid copyright infringement and guarantee the document’s authenticity. Consulting professionals or official organizations may also provide guidance on accessing the CARS test PDF legally and efficiently.

How to Use the CARS Test PDF Effectively

The CARS test PDF is a valuable tool for assessing autism spectrum disorder (ASD) in children. To use it effectively, start by thoroughly reviewing the instrument to understand its structure and scoring criteria. The test consists of 15 items assessing various behavioral domains, such as social interaction and communication. Clinicians should observe the child’s behavior and rate each item based on the provided guidelines. Scoring is standardized, with higher scores indicating greater severity of autism traits. It’s essential to administer the test in a clinical setting, ensuring the child’s behavior is observed accurately. After scoring, interpret the results to determine the severity of ASD and guide intervention strategies. Proper training and expertise are recommended for reliable and valid use of the CARS test PDF.

Case Studies and Practical Examples

The CARS test has been effectively used in various case studies to assess autism severity. For instance, a child displaying social interaction difficulties was evaluated using the CARS, leading to an accurate ASD diagnosis and tailored intervention strategies.

Real-Life Applications of the CARS Test in Autism Assessment

The CARS test is widely applied in clinical and educational settings to assess autism. For example, in a case study, a child with social interaction challenges was evaluated using the CARS, resulting in a severity rating of mild ASD. This informed targeted interventions, improving the child’s communication skills. Such real-life applications highlight the tool’s effectiveness in providing actionable insights for personalized support. Clinicians often use the CARS alongside other assessments to ensure comprehensive evaluations. Its practicality and reliability make it a valuable resource in autism care, helping professionals and families understand and address specific needs effectively.

fruit of the spirit bible study pdf

The Fruit of the Spirit, found in Galatians 5:22-23, represents the supernatural qualities produced in believers by the Holy Spirit, reflecting God’s character and transforming lives through love, joy, peace, and more.

1.1 Definition and Significance

The Fruit of the Spirit, as outlined in Galatians 5:22-23, refers to supernatural qualities produced by the Holy Spirit in believers, reflecting God’s character. These nine attributes—love, joy, peace, patience, kindness, goodness, faithfulness, gentleness, and self-control—signify spiritual maturity and a life surrendered to God, guiding believers to live in harmony with His will and walk by the Spirit, not the flesh.

1.2 Overview of the Nine Fruits

The nine fruits of the Spirit—love, joy, peace, patience, kindness, goodness, faithfulness, gentleness, and self-control—represent the supernatural qualities the Holy Spirit cultivates in believers. These attributes reflect a Spirit-led life, demonstrating God’s character and enabling believers to live in harmony with His will, fostering spiritual growth and a Christ-like nature in everyday life.

Biblical Context of the Fruit of the Spirit

The Fruit of the Spirit is rooted in Galatians 5:22-23, where Paul contrasts the works of the flesh with the virtues produced by the Holy Spirit, emphasizing the transformative power of living by the Spirit in a believer’s life.

2.1 Galatians 5:22-23 and Its Meaning

Galatians 5:22-23 lists the Fruit of the Spirit as love, joy, peace, patience, kindness, goodness, faithfulness, gentleness, and self-control. These qualities signify the Holy Spirit’s transformative work in believers, contrasting the flesh’s destructive tendencies and reflecting Christ’s character in their lives through obedience and trust in Him.

2.2 Contrasting the Fruit of the Spirit with the Works of the Flesh

The Fruit of the Spirit opposes the works of the flesh, listed in Galatians 5:19-21, which include sinful acts like adultery, envy, and anger. While the flesh leads to division and destruction, the Spirit produces qualities like love, joy, and peace, reflecting God’s transformative power in believers, enabling them to walk in harmony with His will and overcome sinful tendencies through divine empowerment.

Understanding Each Fruit of the Spirit

This section delves into the nine supernatural qualities listed in Galatians 5:22-23, exploring their biblical significance and practical application in the life of a believer.

3.1 Love: The Foundation of the Fruit

Love, the first and foundational fruit of the Spirit, is a selfless, sacrificial choice reflecting God’s nature. It is demonstrated through actions, not emotions, and is essential for genuine relationships with God and others, as emphasized in Galatians 5:22 and exemplified in Jesus’ life.

3.2 Joy: A Supernatural Happiness

Joy, a supernatural happiness, is a fruit of the Spirit rooted in God’s presence, not circumstances. It surpasses worldly joy, bringing inner peace and contentment. As Galatians 5:22 highlights, this joy flows from living in harmony with the Holy Spirit, reflecting trust in God’s sovereignty and provision, even in challenging times.

3.3 Peace: Inner Calm in Every Circumstance

Peace, another fruit of the Spirit, is an inner calm that transcends life’s turmoil. It stems from trusting God’s sovereignty and promises, as seen in Philippians 4:7. This peace guards hearts and minds, enabling believers to remain steadfast and content, regardless of external challenges, reflecting God’s presence and reassurance in every situation.

3.4 Patience: Longsuffering and Endurance

Patience, a key fruit of the Spirit, is the ability to endure trials with steadfast hope and trust in God. It involves bearing life’s challenges calmly, trusting in divine timing and purpose. This virtue reflects the Spirit’s work in helping believers remain composed, even in adversity, and respond with kindness, fostering harmony and glorifying God through their perseverance.

3.5 Kindness: Showing God’s Love to Others

Kindness, a fruit of the Spirit, reflects God’s compassionate nature, prompting believers to show genuine care and concern for others. It involves acts of mercy, generosity, and grace, demonstrating love through practical deeds. Rooted in the Spirit’s work, kindness fosters harmony and serves as a powerful witness of God’s character in everyday interactions and relationships.

3.6 Goodness: Living a Virtuous Life

Goodness, a fruit of the Spirit, embodies moral integrity and righteousness, inspiring believers to live virtuous lives. It reflects God’s holiness and compassion, prompting acts of justice, mercy, and generosity. Rooted in a heart transformed by the Spirit, goodness enables believers to consistently choose right and positively impact the world around them.

3.7 Faithfulness: Steadfastness in God

Faithfulness, a fruit of the Spirit, is unwavering loyalty and trust in God, demonstrated through consistent obedience and reliance on His promises. It reflects God’s own faithfulness and enables believers to remain steadfast, even in challenging circumstances, trusting in His goodness and providence, and mirroring His commitment to His people.

3.8 Gentleness: Humility and Meekness

Gentleness, a fruit of the Spirit, embodies humility and meekness, reflecting Jesus’ example of kindness and compassion. It involves treating others with tender care, especially in correction, and trusting God’s power rather than human strength. This trait fosters restoration and unity, as seen in Galatians 6:1, guiding believers to handle conflicts with grace and humility.

3.9 Self-Control: Mastery Over One’s Desires

Self-control, a fruit of the Spirit, enables believers to master their desires and live disciplined, God-honoring lives. It empowers resistance to tempting situations and fleshly impulses, allowing believers to walk by the Spirit. This trait fosters personal growth, healthy relationships, and a deeper reliance on God, embodying the transformative power of the Holy Spirit in everyday choices and actions.

Bible Study Resources on the Fruit of the Spirit

Discover comprehensive Bible study resources, including PDF guides, study materials, and online tools, designed to deepen your understanding of the Fruit of the Spirit through Galatians 5:22-23.

4.1 Recommended PDF Guides and Study Materials

Enhance your study with recommended PDF guides like “Fruit of the Spirit: 48 Bible Studies,” offering in-depth lessons, leader notes, and reflections. These resources provide structured plans, biblical insights, and practical applications to help you explore love, joy, peace, and more. Ideal for personal or group study, they include prayers, discussions, and actionable steps to deepen your spiritual growth.

4.2 Online Tools and Apps for Deepening Your Study

Utilize online tools like YouVersion and Logos Bible Study for interactive lessons and devotionals on the Fruit of the Spirit. These apps offer customizable study plans, audio teachings, and Bible verse annotations, enabling a deeper, personalized exploration of love, joy, peace, and more. They provide accessible resources to enhance your spiritual journey anytime, anywhere.

Practical Application of the Fruit of the Spirit

Living the Fruit of the Spirit involves prayer, trust, and obedience. Believers apply these qualities in daily interactions, decisions, and relationships, fostering a Spirit-led lifestyle.

5.1 How to Cultivate the Fruit in Daily Life

Cultivating the Fruit of the Spirit requires prayer, trust, and obedience. Believers must intentionally choose to reflect love, joy, and peace in their actions and attitudes. By seeking God through Scripture and surrendering to the Holy Spirit, they can grow in these qualities, living a Spirit-led life that honors God in everyday circumstances.

5.2 Overcoming Challenges and Walking by the Spirit

Overcoming challenges requires surrendering to the Holy Spirit’s guidance. By prayerfully seeking God’s will and relying on His strength, believers can navigate difficulties with patience and self-control. Walking by the Spirit involves trusting His lead, prioritizing spiritual growth, and maintaining a mindset centered on love, joy, and peace, even in life’s toughest trials and uncertainties.

Deepening Your Study of the Fruit of the Spirit

Deepen your study by exploring biblical principles, engaging in personal reflection, and participating in group discussions. Utilize Bible study guides and online tools to enhance understanding and application of the Fruit of the Spirit in daily life, fostering spiritual growth and a deeper connection with God.

6.1 Advanced Biblical Principles and Examples

Gain insight into the interconnection of the Fruit of the Spirit, exploring how love serves as the foundation for all other qualities, and discover biblical examples that illustrate the practical application of these virtues in daily life. Study comprehensive PDF guides and detailed Bible study resources to deepen your understanding of the Holy Spirit’s transformative power in cultivating these qualities, as seen in the lives of biblical figures and applied in modern Christian living through faithfulness and self-control.

6.2 Personal Reflection and Group Discussion Ideas

Engage in personal reflection by journaling how the Fruit of the Spirit manifests in your life. For group discussions, explore practical ways to apply these qualities, such as sharing testimonies of patience or kindness. Use guided questions to deepen understanding, like “How does love serve as the foundation for other fruits?” or “What challenges do you face in cultivating self-control?”

Frequently Asked Questions About the Fruit of the Spirit

The Fruit of the Spirit refers to nine divine qualities—love, joy, peace, patience, kindness, goodness, faithfulness, gentleness, and self-control—produced by the Holy Spirit in believers, not based on emotions but on a transformed life in Christ.

7.1 Common Misconceptions and Clarifications

A common misconception is that the Fruit of the Spirit are merely emotions or human efforts. However, they are supernatural qualities produced by the Holy Spirit in believers. Another misunderstanding is that the Fruit and the Works of the Flesh are similar, but they are opposites. The Fruit reflects godly character, while the Works are sinful. Additionally, some believe the Fruit can be earned through good deeds, but they are a result of surrendering to the Spirit, not human achievement.

The Fruit of the Spirit transforms lives, empowering believers to reflect God’s character through love, joy, and self-control. Embrace a Spirit-led life to glorify God fully.

8.1 The Transformative Power of the Fruit of the Spirit

The Fruit of the Spirit transforms believers, enabling them to live in harmony with God’s will. By cultivating love, joy, and self-control, individuals experience inner renewal, reflecting God’s character. This spiritual growth fosters meaningful relationships and a life of purpose, demonstrating the Holy Spirit’s power to change hearts and lives profoundly.

Additional Resources and Further Reading

Explore additional resources like books, sermons, and PDF guides to deepen your understanding of the Fruit of the Spirit. These materials offer comprehensive insights and practical applications, enriching your spiritual journey.

9.1 Books, Sermons, and Online Courses for Continued Study

Enhance your study with books like Fruit of the Spirit by Billy Graham and The Holy Spirit by Charles Stanley. Sermons by David Pawson and online courses on platforms like Bible Study Tools offer deeper insights. Resources from Grace Life Bible Church and Unlocking the Bible by David Pawson provide comprehensive guides for spiritual growth and practical application.

eiyuden chronicle rising trophy guide

Eiyuden Chronicle: Rising combines action-RPG combat with town-building elements, offering a unique gaming experience․ This guide provides tips and strategies to help you unlock all 51 trophies, including the coveted Platinum, by completing the story, side quests, and grinding effectively․ Whether you’re a seasoned trophy hunter or a casual player, this guide will walk you through the journey to achieve 100% completion․

Overview of the Game and Trophy System

Eiyuden Chronicle: Rising features a trophy system with 51 achievements, including 1 Platinum, 2 Gold, 8 Silver, and 40 Bronze trophies․ The game combines action-RPG combat with town-building mechanics, where players rebuild the village of New Nevaeh and explore ancient ruins․ Trophies are awarded for completing story missions, side quests, strengthening equipment, and achieving specific milestones․ Some trophies are missable, requiring careful planning to unlock․ The system encourages exploration, optimization, and grinding, with the Platinum trophy rewarding dedication and completion of all challenges․ While the journey isn’t overly difficult, it demands persistence and attention to detail to unlock every achievement․

Types of Trophies in Eiyuden Chronicle: Rising

Eiyuden Chronicle: Rising features 51 trophies: 1 Platinum, 2 Gold, 8 Silver, and 40 Bronze․ These cover story completion, exploration, and specific challenges․

Breakdown of Platinum, Gold, Silver, and Bronze Trophies

Eiyuden Chronicle: Rising offers a total of 51 trophies, divided into four categories: Platinum, Gold, Silver, and Bronze․ The Platinum trophy is awarded for obtaining all other trophies, signifying 100% completion․ Gold trophies are reserved for significant achievements, such as defeating the main boss or reaching a high level․ Silver trophies focus on completing the story on hard difficulty and finishing challenging side quests․ Bronze trophies are the most numerous, rewarding players for smaller accomplishments like collecting resources, recruiting characters, and crafting items․ Each category represents a different level of challenge, ensuring a balanced and rewarding experience for trophy hunters․

Step-by-Step Guide to Unlocking All Trophies

Start by completing the main story and all side quests to unlock foundational trophies․ Focus on strengthening equipment and regular grinding to prepare for challenging content ahead;

Phase 1: Completing the Story and Side Quests

Begin your journey by completing the main story of Eiyuden Chronicle: Rising․ As you progress, ensure to tackle all side quests, as these are crucial for unlocking trophies and providing essential resources․ Completing these quests will not only strengthen your characters but also contribute to the town-building aspect of the game․ Additionally, interacting with villagers and fulfilling their requests will enhance your progress․ Make sure to regularly upgrade your equipment and tools, as this will aid in overcoming challenges and defeating tougher enemies․ By completing every available quest and focusing on character development, you’ll set a solid foundation for achieving the Platinum trophy․ This phase is essential for building momentum and ensuring a smooth transition to the next stages of your trophy hunt․

Phase 2: Strengthening Equipment and Grinding

After completing the story and side quests, focus on strengthening your equipment and grinding to prepare for the challenges ahead․ Regularly upgrade your weapons, armor, and tools to increase your combat efficiency and resource-gathering capabilities․ Explore the game’s dungeons and areas to farm resources and materials, which are essential for crafting and enhancing gear․ Grinding is particularly important for leveling up your characters and achieving the necessary stats for tougher enemies․ Additionally, consider revisiting previously challenging areas to defeat enemies for valuable experience and loot․ By dedicating time to these activities, you’ll ensure your characters are well-prepared for the later stages of the game and the pursuit of the Platinum trophy․

Missable Trophies and Requirements

Several trophies, like the “One-Hundred Resident Record” and “Adept, for an Acting Mayor,” are missable if specific conditions aren’t met․ Ensure timely recruitment and quest completion to avoid missing these achievements․

Key Missable Achievements and How to Avoid Them

Several achievements in Eiyuden Chronicle: Rising are easy to miss if not addressed properly․ The “One-Hundred Resident Record” requires recruiting all , which is tied to the Platinum Trophy․ Missing even one character can lock you out of this achievement․ Additionally, “A Girl About the Town” demands upgrading all facilities in New Nevaeh to their maximum level, a task that can be overlooked during the main story․ Similarly, “The Road to Recovery” involves accumulating 100,000 baqua, which must be tracked meticulously․ To avoid missing these, ensure you regularly check your progress and complete side quests thoroughly․ Saving frequently and revisiting areas can help prevent missed opportunities․

Grinding and Leveling Up for Trophies

Grinding is essential for trophy completion, focusing on resource farming and leveling up equipment․ Consistent effort ensures progress toward Platinum without overwhelming difficulty․

Tips for Efficient Leveling and Resource Farming

To efficiently level up and farm resources in Eiyuden Chronicle: Rising, focus on completing side quests and strengthening equipment regularly․ Prioritize farming enemies in high-yield areas to maximize resource gains․ Use upgraded tools to increase drop rates and exploration efficiency․ Managing your baqua wisely is crucial, as reaching 100,000 baqua is a key trophy requirement․ Regularly level up your weapons and armor to maintain strength against tougher enemies․ Exploring thoroughly and defeating boss-like enemies can yield significant rewards․ Balancing grinding with story progression ensures steady progress toward the Platinum trophy without feeling overwhelmed․

Recruiting Characters for the Platinum Trophy

Recruiting all is essential for achieving the Platinum trophy․ This includes main story characters and those unlocked through side quests and interactions․

Strategies to Recruit All

To recruit all , focus on completing side quests, village requests, and interactions․ Some characters are unlocked through story progression, while others require specific conditions․ Explore thoroughly, as hidden characters can be found in various locations․ Ensure you check each villager’s needs and fulfill them to unlock new recruits․ Organize a checklist to track progress, as missing even one character can prevent Platinum achievement․ Regularly revisit completed areas, as new interactions may become available․ Be patient and methodical, as recruiting all characters is a significant but rewarding challenge․ Use this guide to identify unique recruitment conditions for hard-to-find characters and streamline your journey to 100% completion․

Useful Tips and Tricks for Trophy Hunters

Optimize your progress by completing story quests first, then focusing on side quests and equipment upgrades․ Regularly check village requests and avoid missing any missable trophies․ Use grinding sessions wisely to boost levels and resources efficiently, ensuring a smooth path to Platinum․ Stay organized and track your achievements to avoid repetitive tasks․ With careful planning and attention to detail, unlocking all trophies becomes achievable and enjoyable․

Optimizing Progress and Avoiding Common Mistakes

To optimize your trophy journey in Eiyuden Chronicle: Rising, prioritize completing story missions and side quests early to avoid missing key achievements․ Regularly upgrade equipment and tools to maintain progress efficiency․ Keep track of village requests and recruit characters systematically to prevent overlooking missables․ Grinding should be focused on specific areas for resource farming, ensuring you meet trophy requirements without unnecessary repetition․ Avoid neglecting to transfer saves if switching platforms, as this could hinder achievement progress․ By staying organized and methodical, you can efficiently unlock all trophies and enjoy a smooth path to the Platinum․

Completing the trophy list in Eiyuden Chronicle: Rising is a rewarding journey that balances story and grind․ Stay persistent, enjoy the adventure, and celebrate your Platinum triumph!

Summarizing the Journey to Platinum

Earning the Platinum trophy in Eiyuden Chronicle: Rising is a challenging yet rewarding experience․ It requires completing the story, all side quests, and recruiting all to achieve the happy ending․ Grinding for resources and leveling up equipment is essential, especially for tackling harder difficulties․ While the journey is not overly difficult, it demands dedication and careful planning to avoid missing key achievements․ With persistence and the right strategies, you’ll unlock all 51 trophies, including the Platinum, and experience the full depth of the game’s engaging story and gameplay mechanics․ This guide has provided the tools to streamline your path to 100% completion․

jlab jbuds mini manual

Welcome to the JLab JBuds Mini manual! This guide helps you set up, use, and troubleshoot your wireless earbuds. Learn about features, customization, and warranty details.

First-Time Setup and Pairing

Start by removing the pull tab and closing the case door with earbuds inside. The case light indicates charging. To pair, select JLab JBuds Mini in your Bluetooth settings.

Step-by-Step Pairing Instructions

To pair your JLab JBuds Mini, start by removing the pull tab from the charging case and closing the case door with the earbuds inside. The case light will indicate the charge status. Next, enable Bluetooth on your device and select “JLab JBuds Mini” from the available options. Once connected, you’ll hear a voice prompt confirming the pairing. If pairing doesn’t occur automatically, quick-tap one earbud 7 times while it’s in the case to reset and retry. Ensure your device is in range and no other devices are connected to the earbuds. Follow these steps for a seamless pairing experience.

Understanding the Charging Case Indicators

The charging case indicators provide essential information about your JLab JBuds Mini earbuds. The LED light on the case shows different statuses: a steady blue light indicates the case is fully charged, while a pulsing blue light means it’s charging. When the case is low on battery, the light will pulse red. If the light is off, the case is either fully charged or out of power. Additionally, the light can indicate pairing status, such as blinking blue/white when the earbuds are ready to pair. These indicators help you monitor the charging and connectivity status of your earbuds and case efficiently.

Connecting to Bluetooth Devices

To connect your JLab JBuds Mini earbuds to a Bluetooth device, start by removing the pull tab and closing the case door with the earbuds inside. The earbuds will automatically enter pairing mode, indicated by a blinking blue/white light on the case. Open your device’s Bluetooth settings and select “JLab JBuds Mini” from the available options. Once connected, you’ll hear a voice prompt or see the LED light turn off. If pairing fails, restart the process by placing the earbuds back in the case and trying again. This ensures a smooth connection to your smartphone, tablet, or other compatible devices.

Features and Specifications of JLab JBuds Mini

The JLab JBuds Mini offers a sleek, compact design with touch controls, delivering crisp sound and deep bass. They feature up to 9 hours of playtime, water resistance, and customizable settings via the JLab app.

Design and Build Quality

The JLab JBuds Mini boasts a sleek, compact design with a lightweight build, ensuring comfort during extended use. The earbuds feature a modern aesthetic, available in multiple color options, and are crafted with durable materials for longevity. The charging case is small and portable, making it easy to carry on the go. Ergonomically designed, the earbuds fit snugly in the ear, providing a secure fit. The touch-sensitive controls are intuitive, allowing for easy navigation of music and calls. The build quality is robust, with a premium feel that exceeds expectations for its size. The Mini’s design prioritizes both style and functionality, delivering a seamless user experience.

Sound Quality and Audio Performance

The JLab JBuds Mini delivers impressive sound quality with clear highs, deep bass, and balanced audio reproduction. Despite their compact size, the earbuds are engineered to provide an immersive listening experience. The acoustic design ensures rich, full-bodied sound that caters to a wide range of music genres. With a focus on clarity and depth, the JBuds Mini offers a premium audio experience in a small package. Whether you’re listening to music, podcasts, or taking calls, the audio performance remains consistent and distortion-free. The earbuds are designed to optimize sound reproduction, making them a great choice for everyday use and on-the-go entertainment.

Battery Life and Charging Times

The JLab JBuds Mini offers a reliable battery life, providing up to 6 hours of playtime on a single charge. The charging case extends this to a total of 24 hours of listening time. The case charges via USB-C, reaching full charge in about 2 hours. Quick charging features allow 15 minutes of charging to provide 1 hour of playback. The earbuds automatically turn off when placed in the case, conserving battery life. The LED indicator on the case signals charging status, ensuring you stay informed about remaining power. This combination of long-lasting battery and efficient charging makes the JBuds Mini ideal for all-day use and travel.

Water Resistance and Durability

The JLab JBuds Mini earbuds feature an IP55 rating, ensuring protection against dust and water splashes. This makes them ideal for active lifestyles, sweat, and light rain. However, they are not fully submersible, so avoid prolonged water exposure. The durable design withstands daily wear and tear, with a sturdy charging case for safe storage. The earbuds’ compact build ensures reliability while maintaining a lightweight feel. Proper care, like avoiding extreme conditions, will extend their lifespan. This balance of resilience and portability makes the JBuds Mini a practical choice for everyday use and outdoor activities, offering peace of mind for users on the go.

Troubleshooting Common Issues

Resolve connectivity or charging issues by resetting the earbuds or checking Bluetooth settings. Ensure proper charging and clean contacts. Visit the manual for detailed solutions.

Resolving Connectivity Problems

Experiencing connectivity issues with your JLab JBuds Mini? Start by ensuring the earbuds are fully charged and the charging case is functioning properly. Forget the “JLab JBuds Mini” from your device’s Bluetooth settings and restart your device. Reset the earbuds by placing them in the case and tapping one earbud 7 times quickly. If issues persist, check for firmware updates in the JLab App. Ensure no other devices are connected to the earbuds. If problems remain, contact JLab customer support for further assistance. These steps should help restore a stable connection.

Fixing Charging-Related Issues

Is your JLab JBuds Mini not charging properly? Ensure the charging case is connected to a USB power source using the provided cable. Check that the earbuds are securely placed in the case, with the pull tab removed. Clean the charging contacts on both the earbuds and the case to remove any dirt or debris. The LED light on the case will indicate charging status. If issues persist, reset the earbuds by tapping one 7 times while in the case. Ensure the case is fully charged before use. If problems remain, contact JLab support for further assistance or potential replacement.

Using the JLab App for Customization

Download the JLab App to customize your JBuds Mini experience. Adjust settings, sound profiles, and button functions. Ensure your earbuds are up-to-date with the latest software updates.

Downloading and Installing the App

To enhance your JBuds Mini experience, download the JLab App from the Apple App Store or Google Play Store. Simply search for “JLab App,” select the app, and click “Install.” Once installed, open the app and follow the in-app instructions to connect your earbuds. The app allows you to customize settings, update firmware, and access exclusive features. Ensure your earbuds are paired with your device before launching the app for seamless integration. Regular updates may add new features, so keep the app up-to-date for optimal performance.

Customizing Earbud Settings and Features

Use the JLab App to tailor your JBuds Mini experience. Open the app, ensure your earbuds are connected, and navigate to the settings menu. Here, you can customize touch controls, sound profiles, and EQ settings. Adjust gestures for play/pause, skip tracks, or activate voice assistant. Personalize sound with preset profiles like Balanced, Bass Boost, or Movie Mode. Firmware updates are also accessible via the app, ensuring your earbuds stay optimized. Explore additional features like button remapping and voice assistant customization for a seamless, personalized experience. Regular app updates may introduce new settings, so check back for enhancements.

JLab JBuds Mini comes with a 2-year limited warranty covering manufacturing defects. Visit JLab’s official website for support, FAQs, or to contact customer service for assistance.

Warranty and Support Information

Understanding the Warranty Coverage

The JLab JBuds Mini is backed by a 2-year limited warranty that covers defects in materials and workmanship. This warranty is valid from the date of purchase and applies to the earbuds and charging case. To claim warranty service, you must provide proof of purchase. The warranty does not cover damage caused by misuse, accidents, or normal wear and tear. For more details, visit the JLab support page or refer to the warranty documentation provided with your purchase.

Reaching JLab Customer Support

For assistance with your JLab JBuds Mini, visit the JLab support page at JLab.com/support. Here, you can find FAQs, troubleshooting guides, and contact options. To reach customer support directly, email support@jlabaudio.com or call 1-855-GO-JLAB. Live chat is also available on their website during business hours; Additionally, instructional videos and manuals are accessible via the JLab Manuals section. For warranty-related inquiries, ensure you have your proof of purchase ready. JLab’s customer support team is available to help with any issues or questions you may have about your JBuds Mini earbuds.

Frequently Asked Questions

Discover answers to common questions about JLab JBuds Mini, such as resetting earbuds, using a single bud for calls, and understanding charging indicators. Visit the FAQ section for more details.

How to Reset the Earbuds

To reset your JLab JBuds Mini, place them in the charging case and forget the device from your Bluetooth settings. Quickly tap one earbud 7 times while it’s in the case. This will reset the earbuds to factory settings, resolving connectivity issues. After resetting, reconnect them by selecting “JLab JBuds Mini” in your Bluetooth settings. Ensure the case light indicates charging before pairing again. Resetting is useful if you experience pairing problems or want to connect to a new device. Follow these steps carefully to maintain proper functionality and enjoy uninterrupted audio performance.

Using a Single Earbud for Calls and Music

Both JLab JBuds Mini earbuds can be used independently for calls and music. Simply remove one earbud from the charging case to activate single earbud mode. The earbud will automatically connect to your Bluetooth device, allowing you to take calls or listen to music without interruptions. To switch between mono and stereo audio, place the earbud back in the case and remove both. This feature enhances versatility, providing a seamless experience whether you prefer using one or both earbuds. The Mini earbuds are designed for convenience and adaptability to suit your listening preferences.